
A big, strong back is a statement. Whether you want to look more muscular, perform better under the barbell, or simply feel better on a day-to-day basis, you need to train your back, and you need to do it properly.
Proper back training begins with the exercises you choose to help you pursue your fitness goals. Commonly regarded as “pulling movements,” there are more viable back-training options than there are muscles in your back in the first place.
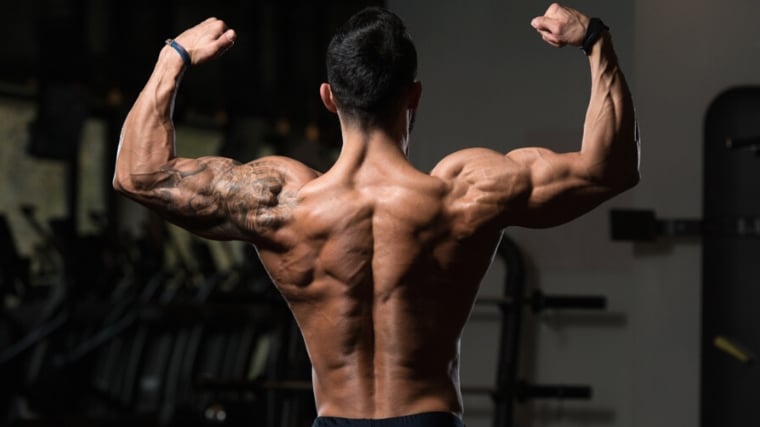
The right exercise can make all the difference in the world when it comes to connecting with these ever-important muscles that you can’t see in the mirror. If your back workouts are lacking, chances are you just haven’t found the right movement — yet. Here are the 25 best exercises for your next back workout.
Best Back Exercises
- Deadlift
- Pull-Up
- Bent-Over Row
- Chest-Supported Row
- Single-Arm Dumbbell Row
- Inverted Row
- TRX Suspension Row
- Lat Pulldown
- Neutral-Grip Pulldown
- Seated Cable Row (for Lats)
- Seated Cable Row (for Upper Back)
- Cable Trap Shrug
- Cable Rope Pullover
- Landmine Row
- Farmer’s Carry
- Towel Chin-Up
- Straight-Arm Pulldown
- Kroc Row
- Pendlay Row
- Face Pull
- Seal Row
- Meadows Row
- Back Hyperextension
- High Pull
- Power Clean
Editor’s Note: The content on BarBend is meant to be informative in nature, but it should not be taken as medical advice. When starting a new training regimen and/or diet, it is always a good idea to consult with a trusted medical professional. We are not a medical resource. The opinions and articles on this site are not intended for use as diagnosis, prevention, and/or treatment of health problems. They are not substitutes for consulting a qualified medical professional.
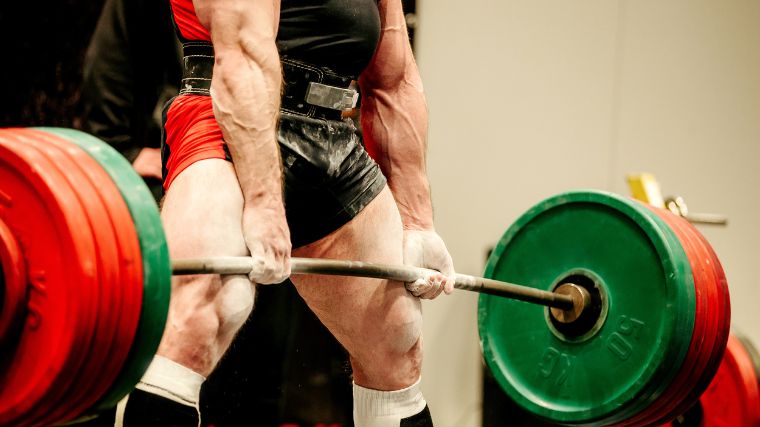
Deadlift
The deadlift is one of the best compound exercises you can do to add serious amounts of strength and muscle mass to your back (as well as your hips and hamstrings). Deadlifts can stress your back using moderate to heavy loads, ultimately offering a one-of-a-kind training stimulus that goes beyond your lats, traps, or rhomboids.
Although your back muscles do not contribute directly to the range of motion of the deadlift, their involvement is paramount for keeping your spine safe and holding the loads necessary for growth.
Benefits of the Deadlift
- It activates your back, hamstrings, glutes, and the muscles in your hips.
- You can load up the deadlift with a lot of weight (once strong enough) to elicit significant strength gains.
- It can be done with high loads or training volumes to help produce muscle and strength gains in the upper and lower body.
How to Do the Deadlift
Stand in front of a loaded barbell with your feet shoulder-width apart, hips back, and back flat. The knees should be bent slightly to allow you to grip the bar tightly, slightly wider than shoulder-width. Keeping your back flat and chest up, tighten the back muscles, and straighten your arms as you load the pull. With everything locked, aggressively push your legs into the floor as you simultaneously pull your chest and shoulders upwards, lifting the bar to the hip.
Coach’s Tip: Let your shoulders hang down and don’t shrug when you perform deadlifts, even if you’re trying to train your back.
Sets and Reps: Go heavy. Start with 3 sets of 3 to 5 reps.
Pull-Up
Don’t assume the pull-up is less effective than the other moves on this list because it’s a bodyweight exercise. Pulling your own body weight creates instability that recruits your core muscles for stability.
Also, if you’re on the heavier side, pull-ups can be immensely stimulating. Lastly, it’s always nice when you need little equipment to get a good workout in.
Benefits of the Pull-Up
- You only need a pull-up bar for this movement, which you can buy for your home gym or find at a park.
- Stabilizing your own body weight will also recruit the muscles in your core.
- Your muscles will still respond to the relatively heavy load that is your own body.
How to Do the Pull-Up
Assume an overhead grip on the bar, slightly wider than shoulder-width. With the arms relaxed and shoulders elevated up to the ears, contract the core and upper back as you initiate the pull-up. Aim to pull your chin to or above the bar level, driving your shoulders away from your ears.
Coach’s Tip: To ratchet up the challenge of the standard pull-up, try to pause for a beat at the top of each rep.
Sets and Reps: Shoot for high reps. Once you can do more than 15 or so pull-ups, you should consider adding weight.
Bent-Over Row
The bent-over row offers a lot of exercise variability. If you have access to kettlebells and dumbbells, you can row those, or you can simply stick with the traditional barbell variation.
By hinging at your hips to row the weight to your stomach, you can really engage your entire posterior chain, from the hamstrings to the traps. Rows of all sorts tend to make up the foundation of most back workouts.
Benefits of the Bent-Over Row
- You can effectively perform the bent-over row with various tools such as kettlebells, dumbbells, or even on a cable machine.
- You overload your muscles more efficiently as you’re able to move a lot of weight in the bent-over row position.
How to Do the Bent-Over Row
Set up as you would for your deadlift by standing feet shoulder-width apart in front of a loaded barbell. Hinge at the hips until your torso is about parallel to the floor. Grab the barbell with a grip that’s a bit wider than your typical deadlift grip. Lean back, so your weight is on your heels, and row the barbell, leading the pull with your elbow until it touches around your belly button.
The barbell shouldn’t touch the floor between repetitions. If you have long arms, you may want to assume a wider grip or allow your torso to be more upright.
Coach’s Tip: If you find yourself limited by your lower back strength, don’t be afraid to wear a lifting belt.
Sets and Reps: Go for moderate reps here, but still lift heavy. Try 4 sets of 8.
Chest-Supported Row
The chest support is the critical element of this row variation: It takes the opportunity for momentum out of the equation, forcing you to rely solely on your muscles to move the weight by providing an external support structure to brace against.
This variation also takes the strain off your lower back since you don’t have to support yourself in a hinged-over position.
Benefits of the Chest-Supported Row
- This move isolates your back muscles so you can activate them to the fullest extent.
- Not standing takes the onus off your lower back to support your torso, relieving potential lower back pressure.
How to Do the Chest-Supported Row
Set a weight bench to a 45-degree incline and lay face down so your chest and stomach are supported. Grab a dumbbell in each hand and then row them to your sides until your elbows pass your torso. Slowly lower the weight under control.
Coach’s Tip: Actively push your chest into the support structure during your reps. Maintain contact the entire time.
Sets and Reps: Maximize the chest support and go for higher reps. Try 3 sets of 12 to 15 reps.
Single-Arm Row
The single-arm dumbbell row is a unilateral row variation that can increase your upper back strength, supplement hypertrophy, and correct muscular asymmetries. No matter what your training goals may be, you should probably have at least one single-arm exercise in your rotation.
Additionally, it can help to increase arm and grip strength. There are a few variations for this exercise, but the most popular has you brace the same-side knee and arm on a weight bench while rowing a dumbbell with the free hand.
Benefits of the Single-Arm Row
- By working one side of the body at a time, you can more easily address muscular imbalances.
- In addition to targeting your back muscles, you’ll also seriously increase your grip strength as you squeeze a heavy dumbbell as hard as possible.
How to Do the Single-Arm Row
Stand next to a bench so that it’s parallel to you. Place the same-side hand and knee on it, and firmly plant your other foot onto the floor. Reach down with your free hand and grab a dumbbell. Keep your back flat and your head in a neutral position. Row the dumbbell to your side until your elbow passes your torso. Complete all of your reps on one side and then switch.
Coach’s Tip: Avoid twisting your torso at the top of each repetition.
Sets and Reps: Since you’re only using one arm, you’ll probably be better off working with high reps. Start with 3 to 4 sets of 10 to 12 reps.
Inverted Row
Instead of rowing a barbell to you, you can flip the script and pull yourself to a fixed bar by performing the inverted row. This exercise is both deceptively challenging and phenomenally effective at stimulating your back; particularly your lats and middle trapezius muscles.
However, the inverted row is generally more accessible since you’re not rowing your complete body weight. This is an excellent move for beginners to build back strength and body control.
Benefits of the Inverted Row
- You’ll engage your arms, back, and grip similarly to the pull-up for muscle activation.
- This significant novice variation allows the user to progress to harder inverted row variations and, eventually, pull-ups.
How to Do the Inverted Row
Place a bar in a rack so that it is supported and stable. Your hands should just reach the bar when you lie down underneath it. Adjust the height as needed. Grasp the bar firmly and set the body in a rigid plank position. Pull your chest to the bar and try to keep your elbows tucked to your sides.
Coach’s Tip: Rowing with your feet on the floor makes the exercise easier. Elevate your feet for more of a challenge.
Sets and Reps: If you aren’t using external weight, row for high reps. Try 2-3 sets of 12-15 reps.
TRX Suspension Row
The TRX suspension row is another bodyweight movement that can build similar back, arm, and grip strength as the pull-up or inverted row.
This is an excellent move for beginners to build up their back strength and body control while also allowing for a less restricted arm path, which may be of use to you if you struggle to connect with the muscles in your back.
Benefits of the TRX Suspension Row
- You’ll engage your arms, back, and grip similarly to the pull-up and inverted row.
- This is another excellent beginner variation that allows users to progress to more challenging row variations and pull-ups.
- The suspension trainer allows for a less restrictive arm path, allowing you to adapt the row to your individual structure better.
FresistanHow to Do the TRX Suspension Row
With your feet at shoulder width, grab the handles and lean back into position. Adjust body position as needed to set difficulty level — the more upright your torso, the easier the exercise will be. With the feet on the ground and the body set in the plank position, pull yourself toward the handles, making sure to keep the elbows from flaring out and the shoulders from collapsing forwards.
Coach’s Tip: Try to maintain the same path of motion with both arms when you do this exercise.
Sets and Reps: Begin with a high-rep scheme like 3 sets of 15 reps.
Lat Pulldown
The pulldown has you pull a bar, attached to a cable pulley, to your chest. The cable’s constant tension increases your time under tension for more stimulation and growth. Also, this is an excellent move for those who can’t yet do a pull-up.
Other than the fact that you’re sitting down, a pulldown is essentially the same movement as a pull-up, except you don’t have to start with your entire body weight.
Benefits of the Lat Pulldown
- The constant tension from the cables creates more muscular activation of the back muscles.
- This move mimics a pull-up, so it’s a great exercise to help you work up to your first pull-up.
- The pronated grip allows you to target upper back muscles, biceps, and lats.
How to Do the Lat Pulldown
Set yourself up with your legs under the pad and hands grasping the bar attachment slightly wider than shoulder-width with a pronated (palms facing away) grip. With the core tight and the torso upright — or even a little arched — pull the bar down to your chin, thinking of driving your shoulder blades together at the end. Slowly resist the weight as you return to the starting position.
Coach’s Tip: A bit of body English is okay here. Return your torso to a vertical position between reps for maximum stretch.
Sets and Reps: You can go heavy with sets of 6 to 8 reps, or pump your back with sets of 12-15.
Neutral-Grip Pulldown
This pulldown variation has you pull a neutral grip (palms facing each other) attachment to your chest. This is another cable-based exercise, allowing you to take advantage of constant resistance. The neutral grip allows you to better bias muscles like the lats and the biceps.
Benefits of the Neutral-Grip Pulldown
- The constant tension from the cables creates a more even resistance for the back muscles.
- This move mimics a chin-up, so it’s a great exercise to help you work up to your first chin-up rep.
- The neutral grip allows you to target muscles of the lats and biceps.
How to Do the Neutral-Grip Pulldown
Set yourself up in the cable pulldown, with your legs under the pad and the hands grasping the attachment with a neutral grip. With the core tight and the torso upright, pull the attachment down to your chin. Slowly resist the weight as you return back to the starting position.
Coach’s Tip: Keep your arms tucked tight to your torso the entire time to maximize the benefits of the movement.
Sets and Reps: You can lift a bit heavier with a neutral grip, try 3 sets of 6-8 reps.
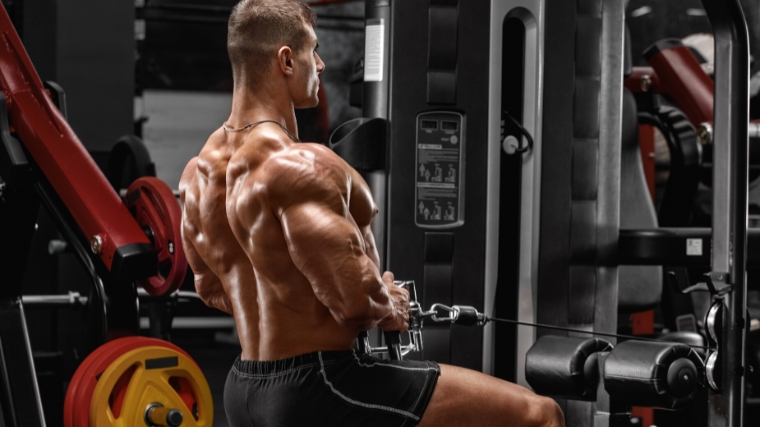
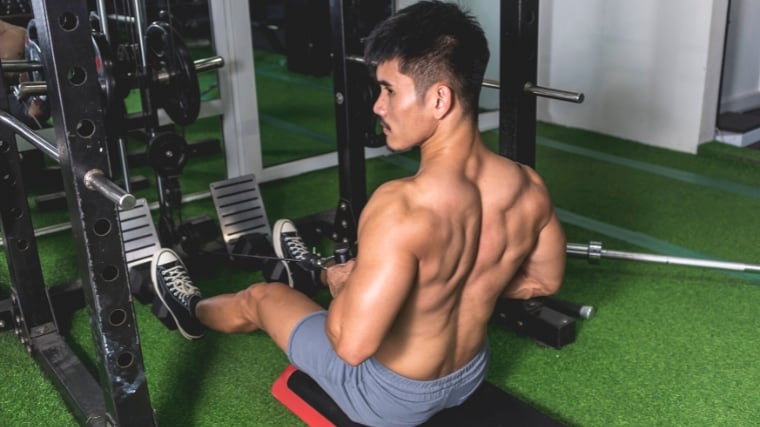
Seated Cable Row (for Lats)
This rowing variation has you pull a shoulder-width neutral grip cable attachment to your torso.
While the cable allows you to take advantage of constant resistance, the hand position and arm path allow for a large amount of mechanical tension on your lats. If you want to emphasize muscle growth, this is a fantastic place to start.
Benefits of the Seated Cable Row (for Lats)
- The constant tension from the cables creates a more even resistance for the back muscles.
- This seated variation is great for building up overall muscle and strength in the back, which translates across your overall training.
- The neutral grip allows you to target the lats and biceps effectively.
How to Do the Seated Cable Row (for Lats)
Set yourself up in the cable row, with your feet on the foot platform and the hands grasping the attachment with a neutral grip. With the core tight and the torso slightly leaned forward at the hip (do not round the back), pull the attachment toward the top of the abdomen. Slowly resist the weight as you return back to the starting position.
Coach’s Tip: Lean forward slightly and allow your shoulders to roll forward during each rep.
Sets and Reps: You can program this exercise any which way, but start out simple with 3 sets of 8 reps.
Seated Cable Row (for Upper Back)
Isolating your upper back isn’t always easy. This rowing variation has you pull an attachment toward your chest, flaring your elbows out in the process. This small adjustment to your technique should result in your upper back doing a lion’s share of the work.
Your arm path in this variation will be higher than the seated row focusing on lats, which will align the rowing motion with the muscles of the rear delts and upper back (traps, rhomboids, and teres major).
Benefits of the Seated Cable Row (for Upper Back)
- The constant tension from the cables creates a more even resistance for the back muscles.
- This seated variation is great for building up overall muscle and strength in the upper and mid-back, which translates across back training and into everyday life.
- The higher arm path and semi-pronated grip allows you to target muscles of the rear delts and upper back.
How to Do the Seated Cable Row (for Upper Back)
Set yourself up in the cable row station with your feet on the foot platform and your hands grasping the attachment with an overhand grip. With a tight core and upright torso, pull the attachment toward the top of your chest, pulling your arms back behind you. Slowly resist the weight as you return back to the starting position.
Coach’s Tip: Think about leading with your elbows and keeping them flared out the entire time.
Sets and Reps: Since you’re slightly limited in strength here, go for higher reps of 12 or more.
Cable Trap Shrug
To train your traps with cables, go for a standard shrug. This movement allows you to target those muscles without having to head for the dumbbell rack.
While shrugs are typically performed with a dumbbell or barbell, they can be optimized with the cable pulley because the resistance from the cables matches the fiber alignment of the upper traps.
Benefits of the Cable Trap Shrug
- The constant tension from the cables creates a more even resistance for the upper traps.
- This variation lines up the resistance with the muscle fibers being trained — maximizing the tension produced and minimizing stress around the shoulder.
- Allows for the lifter to match the cables with their individual structure, limiting joint stress and increasing effectiveness.
How to Do the Cable Trap Shrug
Set yourself up in the middle of two cables, with your feet flat on the ground and the hands grasping the handles. With the core tight and the torso upright, shrug the weight up — driving your shoulders up and in toward your ears. Slowly resist the weight as you return back to the starting position.
Coach’s Tip: Think about shrugging up and back.
Sets and Reps: Since you have a limited range of motion, use higher reps of 12 or more.
Cable Rope Pullover
You don’t have to build your back by relying solely on compound exercises. Isolation lifts, like the cable rope pullover, can provide a more delicate touch while being equally effective for growth.
You can do pullovers with a dumbbell, sure, but cables will provide much more consistent mechanical tension throughout the entire range of motion.
Benefits of the Cable Rope Pullover
- The constant tension from the cables creates a more even resistance for the lats as they contract through the full range of motion.
- This variation can be done anywhere you have access to a cable and rope attachment.
- It provides better resistance compared to the dumbbell pullover, especially for the lats.
How to Do the Cable Rope Pullover
Set yourself up in front of a cable pulley, with your feet flat on the ground and your hands grasping the rope or strap attachment. With a slight lean forward, core tight, and torso rigid, drive the upper arm down as you pull the attachment down and back toward your hips. Slowly resist the weight as you return back to the starting position.
Coach’s Tip: Try to keep your shoulders externally rotated, with your inner arms pointing at your head.
Sets and Reps: Go for higher reps; 2 or 3 sets of up to 15 reps.
Landmine Row
Landmine exercises put a unique spin on standard barbell training. You can use this variation to place tension across your entire back while also allowing you to load up on some serious weight.
The landmine row challenges core stability, lower back strength, and can be performed in different rep ranges depending on your goals.
Benefits of the Landmine Row
- This variation can be done anywhere you have access to a barbell, whether locked in a landmine attachment or wedged into a corner.
- It challenges core stability and strength, while also being a great full body exercise and placing large amounts of tension on the back muscles.
- You can add a variety of resistance patterns with different attachments.
How to Do the Landmine Row
Set your barbell up by sliding it in the landmine attachment sleeve, or by wedging it into a corner of the wall. Stand overtop of the barbell with one foot on each side. Fix the attachment to the barbell and grasp the handles. With a slight lean forward, core tight, and the torso rigid, pull the weight up toward your chest. Slowly resist the weight as you return back to the starting position.
Coach’s Tip: Avoid the temptation of using too much momentum here.
Sets and Reps: You can lift heavy, so go for lower reps. Try 4 sets of 6 to 8.
Farmer’s Carry
Named for its ability to create down-home, real-world carrying strength, the farmer’s carry is both a back-builder and an unparalleled conditioning tool.
The farmer’s carry helps build grip strength, core strength and stability, and improves your postural strength and control.
Benefits of the Farmer’s Carry
- You can do it anywhere you have access to weight and some free space.
- It challenges grip strength, core strength and postural control.
How to Do the Farmer’s Carry
Find a section of open space and hold a pair of dumbbells or kettlebells, or even a trap bar, in your hands. Take slow, controlled steps in a straight line, focusing on stability and distance covered.
When walking with the weights in hand, the challenge is maintaining a steady, upright position and not allowing the weight to move laterally or favor one side over the other. The goal is to maintain a walking path that is straight, narrow, with the load kept close to the body.
Coach’s Tip: Take small, low steps to minimize the amount of time your feet are off the ground.
Sets and Reps: You’ll want to walk for distance or time here, rather than counting reps. Start with a few rounds of 10 to 15-second bursts.
Towel Chin-Up
To ante-up on your pull-up game, go for the towel chin-up instead. You’d be surprised at just how difficult a bodyweight chin-up can be if you don’t have a bar to hold onto.
Adding a towel to the conventional chin-up can increase the overall grip demands of the exercise and provide a unique challenge if you’re bored of doing standard pull-ups.
Benefits of the Towel Chin-Up
- You only need a towel and a chin-up bar to do this movement, which makes it convenient to include in any program.
- Stabilizing your own body weight will also recruit the muscles in your core.
- The addition of the towel will increase the demand on your grip, leading to an improvement in grip strength.
How to Do the Towel Chin-Up
Start by wrapping either a longer bath towel or two smaller hand towels around a power rack or chin-up bar. Assume a neutral grip (palms facing each other), grasping the towels evenly on both sides. With the core and upper back engaged, aim to pull your chin to or above the bar level using the forearms, biceps, and lats.
Coach’s Tip: Think about crushing the towel in your hands to help maintain your grip.
Sets and Reps: Work until your hands give out. Shoot for a few sets for maximum duration to really tax your forearms and back.
Straight-Arm Pulldown
Your back contains a lot of different muscles; isolating them for growth can be quite challenging as a result. The straight-arm pulldown is as close to an “isolation” as you’re going to get for targeting the lats (the largest of the back muscles).
An extended range of motion, constant tension from the cable pulley, and a simple learning curve, makes the straight-arm pulldown a prime muscle-building movement.
Benefits of the Straight-Arm Pulldown
- It allows lifters to isolate and therefore better “feel” the lats. If you have trouble engaging your lats with other back movements, give this one a shot.
- The cable makes the movement feel harder from start to finish, so there’s more muscle-building tension on the target muscle(s) throughout the set.
- Compared to exercises like the lat pulldown and seated cable row, the unique torso angle used during the straight-arm lat pulldown creates a longer range of motion for more time under tension.
How to Do the Straight-Arm Pulldown
Attach a rope handle, straight bar, or EZ-bar to a cable pulley set at the highest setting. (The rope is a popular option.) Take enough steps back so that you can hinge your torso forward 45 degrees and straighten your arms without any slack in the cable. Slightly bend your elbows and then pull the rope to the tops of your thighs. You shouldn’t feel your triceps engage at all.
Coach’s Tip: Leaning forward might help you find a better connection or stretch on your lats.
Sets and Reps: Go for 2 to 3 sets of 12 to 15 reps.
Kroc Row
The Krok row is the namesake rowing movement of powerlifter and bodybuilder, Janae Marie Kroczaleski — who totaled 1,095 kilograms (2,414 pounds) between the bench press, squat, and deadlift in a powerlifting meet.
The premise is simple: Choose a dumbbell that’s slightly heavier than what you’re used to rowing with proper form, and then grind out as many reps as possible using a little body of English to get it done. The heavy, high-volume rows will surely strengthen and grow your back.
Benefits of the Kroc Row
- They’re not conventional, but the intensity of Kroc rows allow lifters to accumulate more reps with more weight — a surefire way to grow.
- You don’t need perfect form. That said, strive to maintain some semblance of a single-arm row. The idea isn’t to row at all costs, but to change your form just enough to get new reps.
How to Do the Kroc Row
Find a heavy dumbbell and roll it somewhere in front of a dumbbell rack (ideally out of other people’s ways). Brace one arm against the rack and stagger the opposite leg back. Hinge over and grab the dumbbell with your free hand. For this rowing variation, lifting straps are encouraged. You don’t want your grip to be your limiting factor. Now, aim to row your elbow past your torso.
Coach’s Tip: Don’t forget to breathe! This exercise can rapidly fatigue your cardiovascular capacity.
Sets and Reps: “Proper” Kroc row programming involves multiple sets of 15 to 20 heavy reps.
Pendlay Row
This dead-stop rowing variation — created by late weightlifting coach Glenn Pendlay — adds some explosive power to the standard barbell row by requiring that you pause with the weight on the floor between reps.
The pause has two effects: 1) it eases the burden on your lower back, which can fatigue from sustaining a hinge position while consistently rowing weight, and 2) you can train your power output capacity and force generation.
Benefits of the Pendlay Row
- Great for developing muscular power in your upper back.
- Bracing your back during heavy rows fortifies core bracing, which is a must for squats and deadlifts.
How to Do the Pendlay Row
Stand in front of a loaded barbell, assuming your typical deadlift stance — feet about shoulder-width apart, shins resting against the bar. Hinge your torso forward until it’s parallel to the ground. Grab the bar with a grip that’s slightly wider than shoulder-width. Brace your core and explosively row the bar to your stomach. Lower the bar back to the floor and pause briefly before initiating the next rep.
Coach’s Tip: To generate maximal power, don’t be afraid to make forceful contact between the bar and your chest as you row.
Sets and Reps: This is a power movement, so keep your reps low. Do 3 sets of 3-6.
Face Pull
It’s not all about strength and mass. To facilitate strong lifts, even the small muscles and joints need to be strong and stable. Enter the face pull, an exercise that contracts your rhomboids, rear delts, and traps to facilitate proper posture and mobility of the shoulder joint.
Don’t go heavy with this movement and don’t expect to build mounds of muscle, either. You need to “eat your vegetables” in the weight room with effective prehab movements. So, you do yourself a favor and grab a forkful of face pulls the next time your train.
Benefits of the Face Pull
- More scapular stability. The face pull has lifters squeeze the shoulder blades back, which strengthens this function that’s crucial for getting set in the bench press and bracing during deadlifts.
- A focus on traps and rhomboids. Ok, it’s not a significant muscle-builder, but the face pull does target the upper back muscles which, when worked enough, will grow as a response.
How to Do the Face Pull
Clip a rope attachment to a cable pulley set to the highest setting. Grab the rope with both hands, palms facing each other. Take a few steps back so there’s tension in the rope. Raise your hands so the rope is level with your face. Simultaneously pull the rope toward your face and flare your elbows out and back. The movement should look like a front double biceps pose.
Coach’s Tip: Consciously externally rotate your shoulders as you pull so the insides of your arms point forward.
Sets and Reps: High reps are really juicy here; do multiple sets of as many as 20 reps.
Seal Row
The seal row has you row a loaded barbell from a prone position on a flat bench. Momentum is taken completely out of the equation, putting the onus completely on the back muscles.
One downside: Unless you have access to a seal row-specific machine, you’ll need to place a flat bench on a few bumper plates and have a friend hand you the barbell, which can be a pain. This movement is, however, fantastic for sparing your lower back if you want to row heavy.
Benefits of the Seal Row
- Your back muscles are doing all of the work during the row, making this an ideal movement to build hypertrophy.
- It’s versatile. You can row kettlebells, dumbbells, or barbells.
How to Do the Seal Row
Place a flat weight bench on top of bumper plates — so one stack on either end of the bench. Elevate the bench enough so that when you’re laying down with your arms extended, the weights don’t touch the floor. Have a gym partner hand you either a barbell or dumbbell. Contract your glutes and core. Row the weights until they’re touching or next to the bench. Lead the pull with your elbows. Slowly lower the weights back to the starting position.
Coach’s Tip: The setup is half the battle. Make sure you situate yourself for this movement in a way that doesn’t interfere with other patrons.
Sets and Reps: Start with 3 to 4 sets of 8 to 10 reps.
Meadows Row
This unique rowing variation requires you to row a barbell in a landmine attachment with one arm. Named after late bodybuilding coach and competitor John Meadows, this lift is another option in your single-arm repertoire for back development.
This row specifically targets the upper back muscles, including the traps, rhomboids, and many of the smaller tissues that articulate the scapula.
Benefits of the Meadows Row
- You can target your upper back with more weight than other upper back-focused exercises typically allow you to use.
- It’s a unilateral movement, so the Meadows row — named after the late John Meadows — creates more core activation as you actively resist excessive rotation.
How to Do the Meadows Row
Stand in a staggered stance with the front foot perpendicular to a barbell loaded into a barbell sleeve. Bend over at the waist and grip the bar with an overhand grip. Rest the elbow on your front thigh, making sure the hip closest to the bar is higher than the front hip. Row the weight up so your hand ends up outside your chest. Lower the weight back down and repeat.
Coach’s Tip: Hold each rep for a moment at the top to emphasize scapular positioning.
Sets and Reps: One-armed lifting means higher reps. Do 2 or 3 sets of 12-15 reps.
Back Hyperextension
It’s not unusual for lifters to toss lower back-specific exercises to the curb in favor of more rows and pull-ups. The fact is, training your lower back isn’t all that sexy, but it’s crucial for general postural stability and core strength.
The back extension has you simply hinge at your waist, with your legs resting on thigh pads, to engage your erector spinae muscles.
Benefits of the Back Hyperextension
- They’re perfect for targeting your lower back muscles.
- You can do them with your own body weight — a popular choice — or while holding a weight plate to your chest.
How to Do the Back Hyperextension
Place your things against the pads of a back extension machine, and ensure that your achilles tendon is right under the ankle pad. Cross your arms. Slowly hinge forward until your body forms a 90-degree angle. Contract your glutes and hamstrings to come back to the starting position.
Coach’s Tip: Don’t be afraid to consciously curl and uncurl your spine to emphasize your lower back.
Sets and Reps: High reps work wonders here. Do 2 sets of 15-20 reps, or 10-12 if you’re using extra weight.
High Pull
Your back training doesn’t always have to be controlled and calculated. You can make some tremendous muscle gains and change your physique if you let loose a bit with an exercise like the high pull.
High pulls are, basically, partial Olympic lifts — you use your entire back to guide and propel a barbell upward in one swift motion. Lifting heavy is all well and good, but once you add some speed to the mix, your back training really starts to take off.
Benefits of the High Pull
- Brings with it all the benefits of the Olympic lifts without having to learn complex techniques.
- Great for getting your heart rate up in addition to stimulating your back
- Will absolutely eviscerate your traps and rhomboids in particular.
How to Do the High Pull
You can perform high pulls with a barbell on the floor, or lift from what weightlifters call the hang position — starting from a standing position, tip over at the waist and allow the barbell to drift down your thigh until it reaches about the height of your kneecaps.
Hang high pulls are easier to string together for multiple repetitions, while lifting from the floor should let you use more weight.
In either case, your goal is simple: Push into the floor with your legs and rapidly ascend to a standing position. At the top, allow your momentum to elevate the barbell by extending your hips, knees, and ankles simultaneously.
As the barbell moves upward, pull hard on it with your arms and shrug your shoulders. You should be able to pull the bar to around the height of your sternum. As it falls, move with it and return to your starting position.
Coach’s Tip: Let your legs “do the work” of elevating the bar before you engage your upper body to pull.
Sets and Reps: High pulls are explosive; do 3 to 5 sets of 3 to 6 reps at most.
Power Clean
From the training hall at the Olympic Games to just about every high school weight room in the world, athletes of all levels rely on the power clean to make themselves, well, more powerful.
The power clean also happens to be an underrated upper-back builder. What you lack in controlled eccentric tension, you make up for with lightning-fast muscle contractions and a serious trap pump as well.
Benefits of the Power Clean
- Mimics the technique of the full clean without requiring you to catch the weight in a deep squat.
- Your entire back has to work as one synchronized unit to stabilize the barbell.
- Great for general sports performance as well.
How to Do the Power Clean
Assume a modified conventional deadlift starting position; the bar should be over the middle of your feet, your hips should be a bit lower than usual, and your knees should be in front of the barbell when you start.
From here, break the bar off the floor by pushing down with your legs (your knees should naturally track out of the way). Continue pushing such that the bar naturally moves up, gliding along your thighs.
When the bar reaches mid-thigh, explode by extending your entire lower body at once. This will elevate the bar in space. Then, catch the bar in a high front squat position. You may want to move your feet out to a wider stance when you receive the bar.
Coach’s Tip: Think of your back as the frame that enables your power during the clean. Don’t pull with your arms, but maintain a rigid upper back the whole time.
Sets and Reps: Go relatively heavy for several sets. Try 4 to 5 sets of 3 to 4 reps.
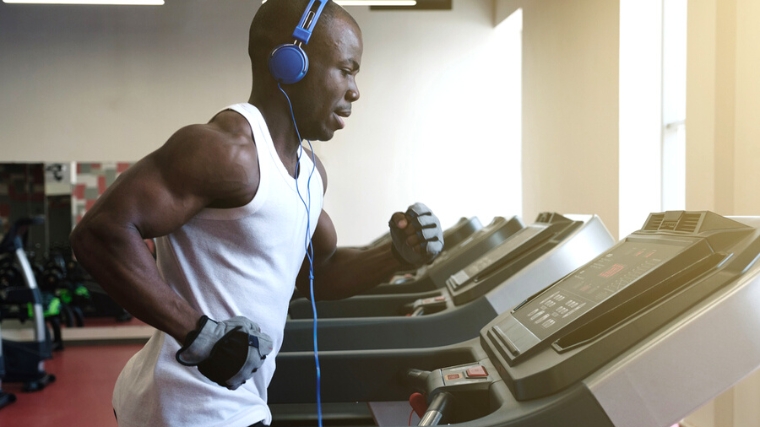
How to Warm Up Before Training Back
A well-designed warm-up helps reduce the risk of injury and improves readiness heading into your training session, without generating excessive fatigue. Increased body temperature, an activated (excited) nervous system, and a prepared mental state can help increase readiness for the upcoming day of training.
One of the most effective warm-ups for any muscle group is going to be the exercises you are performing in that day’s training session. For example, if you’re performing pulldowns, you can warm up by performing light reps and increase intensity as you proceed towards your working sets. This ensures that the appropriate muscles and joints are being primed, reducing the risk of injury and improving your overall training performance.
Sample Back Training Warm-Up
Minimalism works wonders, however, if you have the luxury of time to spare, you can get a bit more in-depth with your back warm-up and have a better workout as a result. Here’s what a comprehensive warm-up protocol might look like, beginning as soon as you set foot in the gym:
- 5-10 minutes on the treadmill, elliptical, stair-stepper, or rowing machine.
- Dead Hang Pull-Up: 3 x 15 seconds.
- Cable or Band Straight-Arm Pulldown: 3 x 20 with light resistance.
- Then, do 1-3 warm-up sets of your first exercise with a light weight.
How to Structure Your Back Training
Your back muscles cover a large portion of your upper body. As such, you’ll either want to train your back on its own, paired with an antagonistic muscle like your chest, or on the day that you deadlift.
Here are three benchmarks for your back workouts — it’s up to you to decide how to integrate them into your routine.
Sets and Reps
Anywhere from 12 to 18 sets per week is likely a great starting point for anyone looking to grow their back. More advanced trainees could potentially exceed 18 sets per week if their goal is to develop a specific part of the back over another.
Choose three to four exercises and divide your training sets equally among them. Try to have a one-to-one ratio of vertical pulls to horizontal pulls (vertical pulls being movements where your torso is upright) for equalized development and stimulus.
Remember, there is a limit to how much you can do per workout while still being productive. If you notice your performance dropping off, it may help to split up some of the training volume to a day later in the week. A training frequency of two to three sessions a week has been recommended to help maximize muscle growth. (2)
Exercise Selection
The position of your grip will play a significant role in the muscles being biased during any exercise. Muscles of the back work in synchronicity to achieve a wide range of movement patterns. Therefore, you’ll bias different muscles depending on how you grip a specific exercise.
When choosing exercises to perform, you want to pick exercises that:
- Give sufficient load to the muscle without excessive stress on the surrounding joints.
- Line up the resistance with the muscle(s) you want to train.
- Work around pre-existing injuries or limitations.
- Can be performed with the equipment in your gym space.
When it comes to working out your back, there are many great options for exercises and tools to get the job done, including cables, machines, free weights, and body weight.
Exercise Order
It’s not only about what you do and how you do it; it matters when. Placing compound exercises first in your back workout is most preferred, especially for beginners. This is because the more tired you get, the worse your technique will become, potentially increasing the risk of injury later in the workout.
Placing exercises like deadlifts and other barbell variations — that demand more from your body — toward the start of your workout will increase the effectiveness of your training.
- Deadlifts
- Seated Cable Row
- Farmer’s Carry
- Cable Trap Shrug
This is an example of a meat-and-potatoes back training session. The heavier, more challenging compound lifts are performed first while you’re nice and fresh, tapering down to targeted isolation work towards the end.
Back Training Tips
The muscles of the back support many different functions in the human body, both functionally and structurally. When training your back to grow or get stronger, there are a handful of rules that can help you improve your performance while limiting risk of injury.
Stabilize
Establishing tension in your upper back (between the shoulder blades) during the setup of an exercise can help add stability to your upper body during back exercises. Increased stability can help you produce more force during an exercise, leading to increased performance and more quality training volume.
Your Grip Matters
The position of your grip will play a significant role in the muscles being biased during any exercise. A wider and more pronated grip results in more upper-back focus but less lat activation overall.
Having your hands closer together and in a more neutral or supinated grip will involve more lats and biceps relative to the upper back. Conversely, taking a grip which allows you to flare your arms out to the sides more will lead to preferential stimulus of the rhomboids, rear delts, and traps. These postural adjustments are what make back training so robust and customizable.
Train the Full Range
To reap the full benefits of training the back (or any muscle group), you need to ensure you fully contract the muscle by lifting through a complete range of motion. Not only is it a bad technique habit to only perform half of your capable range, you’re also leaving gains on the table.
Free weights and cable machines are best suited for going through long, sweeping pulls often found in back movements. Machine work has its place, but the fixed plane of motion leaves it somewhat restricted.
For back training specifically, be sure to allow your shoulders to move freely during exercises like rows and pulldowns — the lats are a prime mover in retraction of the scapula, so you shouldn’t inhibit their role by locking the shoulder down the whole time.
Use Momentum (Sometimes)
If your goal is building muscle and strength, creating and maintaining significant amounts of tension in the target muscle is imperative for stimulating positive muscular and neural adaptations. When you generate momentum, you can sometimes bypass the part of the rep that places the most significant amount of tension on the muscle — working against the ultimate goal.
So, is it ever appropriate to create momentum within an exercise? It absolutely is. At the tail end of a hard set, you can use some body English to squeeze out another rep or two — think of this as contained “cheat reps.” Momentum can also be used to help drive neuromuscular adaptations that help with building strength and power.
For tempo specifically, if your goal is growing the size of your back, then start the exercise slowly and then accelerate through the rest of the rep — squeezing through to the top and contracting hard.
Benefits of Training Your Back
People often refer to your legs as your foundation. That comparison makes sense, but your back is what holds the structure together. Your spine is held in place by the muscles in your back.
Without your lats, rhomboids, traps, and spinal erectors, you’d struggle to even stand up straight, much less work with a heavily-loaded object in your hands like a barbell.
Improved Sport Performance
For athletes, a strong back is paramount. Your back muscles allow you to pull your arms in, and — in conjunction with your core and hips — rotate your torso. If you practice Jiu-Jitsu, a stronger back means you can drag and pull opponents with more force.
Rock climbers will be able to hold a strenuous position for longer and ascend more efficiently. And CrossFit athletes will benefit from the back strength they need to perform pull-ups, snatches, and various carries and climbs.
Carryover to Other Lifts
A strong back can really improve all aspects of your lifting routine, too. Even if you’re not actively working your back, those muscles still play a role in your weight training. If you’re bench-pressing, a bigger back provides more of a base for you to stabilize on.
The strength of your lats will help give your chest the stability needed to maintain a high amount of tension. When you deadlift, strong back muscles grant you the ability to maintain neutrality in the spine, helping prevent spinal rounding, which could possibly lead to injury.
Better Posture
Back training does more for you than just helping you perform other exercises better. Since much of the musculature of the back is directly responsible for influencing the spine, a well-developed posterior chain directly impacts your posture as well.
Big lats, a healthy lower back, and well-developed rear delts and traps will all help you stand up straighter, sit upright for longer periods without slouching, and, as a tangential perk, make you look like a tank in a t-shirt.
Back Anatomy
Your back is a group of muscles that work together to achieve a wide range of movement patterns. As such, different muscles will be biased more or less depending on the action being performed. The primary muscles of the back include the latissimus dorsi (lats), teres major, trapezius (traps), rhomboids, rear delts, and erector spinae (lower back).

When performing any movement using the muscles of the back, you will be using both muscles positioned more superficial (like the lats and traps), as well as deep (like the rhomboids or erector spinae) within the back and torso. The back, while composed of many different muscles with unique functions, is designed to work as a unit.
Latissimus Dorsi
The Latissimus Dorsi — commonly referred to as the lats — are most commonly known for their role in moving the arm toward and around the back of the body. During back movements, the lats play many roles — most notably stabilizing the pelvis and interacting with the abdominal muscles in everything from respiration, maintaining shoulder positioning, to protecting the spine. (1)
Teres Major
The teres major — sometimes referred to as the “little lat” — attaches right next to the lat on the upper arm and stretches across to the lower part of the scapula. This muscle — although not officially a part of the rotator cuff — shares many roles with the muscles of the rotator cuff (alongside its little brother, the teres minor) when it comes to glenohumeral (shoulder) stabilization.
It also assists the lat in adducting (bringing closer to the body) the arm back toward the midline of the body — like in a pulldown motion. (2)
Trapezius
The trapezius, or traps, is a large trapezoid-shaped muscle that spans across the better part of your upper and mid-back. This muscle plays a vital role in stabilizing the scapula and its middle fibers have the primary function of bringing the shoulder blades together. Each of the divisions of the traps is hard at work during pulling movements to help maintain tension and stability in the back. (3)
Rhomboids
The rhomboids — both major and minor — are positioned directly below the traps in the middle of the back (between the shoulder blades). These muscles retract, elevate, and rotate the scapula. Weakness or loss of function of the rhomboids can be a major contributing factor to a winged scapula, which makes it even more important to keep them strong. (4)
Rear Delts
The rear delts — also known as the posterior deltoid — are not usually categorized as back muscles. That said, the rear delt’s primary function is to bring the arm back around the body (shoulder extension), assisting the lats and teres major. A flared arm position makes the rear delts a major mover, making this muscle a big part of your back strength and development. (5)
Erector Spinae
These deep muscles are responsible for controlling the axial skeleton — which includes the skull, vertebral column, and ribs — and have a primary function of flexion/extension, side bending, and rotation of the spine. The lower back is critical for stabilizing the pelvis and spine during movements such as the deadlift, good morning, or many of the rowing movements we’ve discussed. (6)
More Back Training Tips
While these entries cover the back from top to bottom, this list is just a starting point. There’s a wide array of back training wisdom waiting to be seized. Your next read is right here:
- 7 Barbell Back Exercises That Are NOT The Deadlift
- The Barbell Vs. Dumbbell Row — Which is Better for Strength, Hypertrophy, & Fitness?
- 4 Exercises to Strengthen Your Lower Back
References
- Jeno SH, Varacallo M. Anatomy, Back, Latissimus Dorsi. [Updated 2020 Aug 13]. In: StatPearls [Internet]. Treasure Island (FL): StatPearls Publishing; 2021.
- Barra-López, M. E., López-de-Celis, C., Pérez-Bellmunt, A., Puyalto-de-Pablo, P., Sánchez-Fernández, J. J., & Lucha-López, M. O. (2020). The supporting role of the teres major muscle, an additional component in glenohumeral stability? An anatomical and radiological study. Medical hypotheses, 141, 109728.
- Ourieff J, Scheckel B, Agarwal A. Anatomy, Back, Trapezius. [Updated 2020 Aug 22]. In: StatPearls [Internet]. Treasure Island (FL): StatPearls Publishing; 2021.
- Farrell C, Kiel J. Anatomy, Back, Rhomboid Muscles. [Updated 2020 Jul 27]. In: StatPearls [Internet]. Treasure Island (FL): StatPearls Publishing; 2021.
- Elzanie A, Varacallo M. Anatomy, Shoulder and Upper Limb, Deltoid Muscle. [Updated 2020 Aug 22]. In: StatPearls [Internet]. Treasure Island (FL): StatPearls Publishing; 2021.
- Modes RJ, Lafci Fahrioglu S. Anatomy, Back. [Updated 2021 Mar 27]. Treasure Island (FL): StatPearls Publishing; 2021.
Featured Image: Studio Peace/Shutterstock