
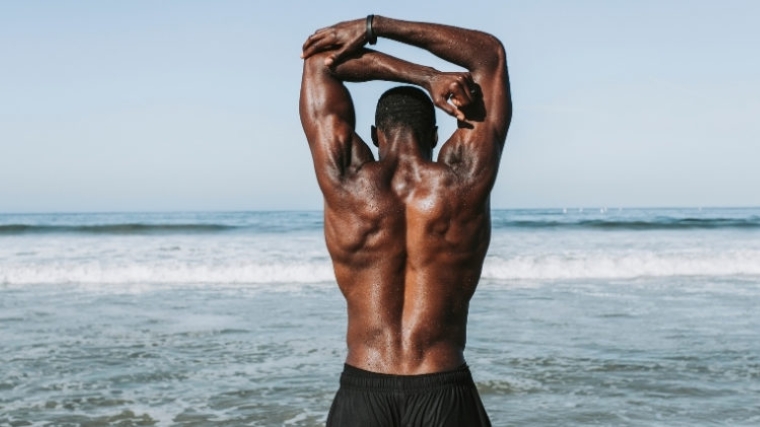
For veteran gym rats, traps are the new abs (having abs is still nice, though.) That’s because big traps, a primary upper back muscle, signals that you have your priorities straight. Your upper back muscles not only help support healthy posture by keeping your head and neck in place, but they also provide a place to rest a loaded barbell and translate to more overall pulling strength.
Below are the 13 best upper back exercises for overall back development, strength, and aesthetics. There’s a mix of old school exercises like the barbell bent over row to new school exercises like the TRX row. These movements target all your major upper back muscles like your rhomboid, trapezius, and rear deltoids.

We’ll also get into the anatomy and functions of the upper back and why it’s important to train, as well as the benefits of training the upper back.
Best Upper Back Exercises
- Barbell Row
- Single-Arm Dead-Stop Row
- TRX Row
- Single-Arm Landmine Row
- Seal Row
- Face Pull
- Hang Clean
- High Pull
- TRX YTW
- TRX Inverted Row
- Power Clean
- Rack Pull
- Band Pull-Apart
Editor’s Note: The content on BarBend is meant to be informative in nature, but it shouldn’t take the place of advice and/or supervision from a medical professional. The opinions and articles on this site are not intended for use as diagnosis, prevention, and/or treatment of health problems. Speak with your physician if you have any concerns.
Barbell Row
The barbell row strengthens your upper back, shoulders, biceps, grip and it’s the perfect accessory exercise for improving your deadlift.
The bent-over row also mimics the hip hinge and holding the hip hinge under load for time will help improve your lower and upper back endurance.
How to Do the Barbell Row
- Hinge at your hips and grab a loaded barbell with a grip that’s slightly wider than shoulder-width.
- Squeeze your shoulder blades together and row the barbell until it’s touching your stomach; you want your elbows to be angled at about 45 degrees throughout the movement.
- Hold the top position of the row for a beat and then slowly lower the weight back down.
Coach’s Tip: The more upright your torso is during the row, the more you’ll engage muscles like your traps and biceps at the expense of your lats.
Benefits of the Barbell Row
- Adds strength and mass to your upper back, lats, and erector spinae.
- Reinforces good hip hinge mechanics, which will have a direct carryover to your deadlift.
- Helps improve your posture through a stronger muscular support system.
Single-Arm Dead-Stop Row
There’s a multitude of variations to choose from with the single-arm dumbbell row. Single-arm dumbbell rows are perfect for ironing out strength imbalances that often exist between sides and you’ll get some extra core work in the form of lateral stability.
With the dead stop row, you’ll go through a longer range of motion and because of the pause on the floor to rest your grip, you’ll be able to go heavy for more muscle growth.
How to Do the Single-Arm Dead-Stop Row
- Set up by kneeling your non-working-side knee on a bench. Use the corresponding arm to support your torso.
- Place your working-side leg on the floor like a kickstand behind you, and then reach down to grab the dumbbell.
- From here, row by pulling your elbow toward your torso, keeping your upper arm tucked to your sides the entire time.
- Reverse the motion and lower the dumbbell all the way back down to the floor. Let it rest on the ground for a beat, and then row again.
Coach’s Tip: Take a moment between reps to readjust your grip if necessary.
Benefits of the Single-Arm Dead-Stop Row
- The pause on the floor gives your joints a quick break and allows you to use a heavier weight.
- Stopping and pausing on the floor takes away the stretch reflex of the muscle, so your muscles work harder on the concentric part of the lift.
TRX Row
The beauty of the TRX is you can increase or decrease the intensity simply by adjusting the foot position closer or further away from the anchor point, which is great for beginners and advanced lifters alike.
This exercise when performed for higher reps will have you feeling your upper back muscles more than ever before. It’s also a great option for beginners who want work up to weight training, and/or people who want to avoid loading up their joints with weights. Because this is a bodyweight exercise, it’s generally easier on your joints.
How to Do the TRX Row
- Hold the strap with one or two hands by your hips and walk feet towards the anchor point until you feel you have the right level of difficulty.
- Keeping your shoulders down and chest up, pull yourself towards the anchor point until you feel a contraction in your upper back. Slowly return to the starting position and repeat.
Coach’s Tip: Try pausing at the top of each rep to really feel your upper back contract isometrically.
Benefits of the TRX Row
- Can easily adjust the intensity allowing you to more or fewer reps depending on your strength goals.
- Strengthens the shoulder stabilizers, spinal erectors, and deep abdominal muscles due to the instability of the TRX.
- Accessible to all levels of lifters.
Single-Arm Landmine Row
The single-arm landmine row is a unilateral exercise, meaning you work one side of your body at a time. This allows your weaker side to catch up to your dominant side, which, in the long run, will result in more overall strength.
Also, rowing a barbell that’s front-loaded with weight shifts the tension for a different feel — which some lifters may or may not like. But how is it better for your upper back? Mainly because you can more easily control the angle and positioning of your body in relation to the load — essentially rowing the weight right to your shoulder.
How to Do the Single-Arm Landmine Row
- Stand to the side of the barbell, loaded into a landmine apparatus, and hinge your hips back and rest your non-working hand on your knee and grab the barbell.
- Keeping your chest up and shoulders down, pull towards your hip until you feel a strong contraction in the upper back. Slowly lower down and repeat.
Coach’s Tip: Use a thumbless grip for some extra forearm engagement here.
Benefits of the Single-Arm Landmine Row
- This row is done in a variety of positions which is great for hitting your upper back from a variety of angles.
- Adds size and strength to your upper back muscles.
Seal Row
The seal row is a rowing variation that has you lay face down on an elevated workout bench, holding a barbell with both hands so that it’s not touching the floor. This prone position takes any and all momentum out of the movement so that your upper back muscles are doing all of the (literal) heavy liftings.
Most lifters go heavy with rows and use more biceps and less scapula retraction which leaves the rhomboids neglected. This exercise solves both of these issues.
How to Do the Seal Row
- Set up on a bench so that you can fully extend your arms without the barbell touching the ground. Do this by propping up a bench on either two low boxes or a stack of bumper plates.
- Then, lie face down on the bench with the barbell underneath you and squeeze your glutes and brace abs.
- Think about pulling your elbows towards the hip as the barbell touches the bench. Lower down to the floor and repeat.
Coach’s Tip: You can also perform seal rows with a pair of dumbbells to make the exercise more grab-and-go.
Benefits of the Seal Row
- You can get yourself into a true horizontal position to optimally target your lats and middle back muscles.
- The prone position takes away all momentum, so you can really isolate the target area.
- This is another lower-back friendly variation, as it’s not working to support you in any sort of hinge position.
Face Pull
Face pulls will help add size, strength, and endurance to the rear shoulders and upper back. The external rotation at the end of the movement will help pull the shoulders back so you’re really activating the traps and rhomboids, which are primary movers in scapular retraction.
Be sure not to go too heavy because you want to ‘feel’ those muscles working and not let your biceps take over. You can also do these anywhere as long as you have a quality resistance band.
How to Do the Face Pull
- Hold the rope with an overhand grip with your thumbs up, and then walk back until your arms are outstretched.
- Get into an athletic stance, activating your core and glutes and with your shoulders down and chest up.
- Squeeze your shoulder blades together as you pull the rope towards your face. Hold this position for two seconds and return to the starting position.
Coach’s Tip: Externally rotate your shoulders, opening up and revealing the inside of your upper arm, as you pull.
Benefits of the Face Pull
- Increases shoulder strength, scapular stability, and strengthens external rotation.
- A great low-intensity exercise that can be paired with strength exercises that need upper back strength and good posture.
- As it directly isolates the upper back and is easy to perform, it is a great exercise to improve posture.
Hang Clean
Nothing against the power clean, which is a staple in most professional weight rooms. But the hang clean has a shorter learning curve, and you can generate power from a lower-back-friendly position.
The hang clean still requires a powerful hip drive, a strong pull, and the classic dip-and-catch. The catch in the front rack will help develop a bigger yoke.
How to Do the Hang Clean
- Stand tall with the barbell at arm’s length with an overhand grip, and feet shoulder-width apart.
- Hinge at the hips until the bar is at your knees.
- Push your feet into the floor and snap your hips so the bar flies upward. Drop into a squat and catch the bar in the front rack position.
Coach’s Tip: Lift and plant your feet in a wider stance as you catch the bar for more stability.
Benefits of the Hang Clean
- Develops the powerful hip drive needed for both sports and general lifting.
- Builds strong upper trap muscles with the pull and catch.
- Helps develop neuromuscular power, muscular coordination, and athleticism.
High Pull
The high pull is almost identical to the hang clean except you omit the catch and squat. This makes it a less technical move with a shorter learning curve while still torching your upper back.
You can perform high pulls from either the hang, to get your hips more involved, or off the floor to increase range of motion. Remember that whatever gives you more leverage will mean more weight — and thus more gains.
How to Do the High Pull
- Grip the barbell with a wider than shoulder-width grip and hinge at the hips until the barbell is around knee height.
- Powerfully snap your hips forward and extend the knees forcefully while pulling the bar as high as possible.
- Keep your elbows high while pulling the bar towards your neck.
Coach’s Tip: Think about pulling with your elbows, not your hands.
Benefits of the High Pull
- A less technical move that still trains the muscles of the upper back.
- Strengthens the mid and upper traps for better posture and a bigger yoke.
- Builds hip and core strength simultaneously.
TRX YTW
The TRX YTW is three exercises in one that strengthen the upper back from different angles for better muscle development. This is a great exercise for correcting poor posture and strengthening the muscles surrounding the shoulder, particularly the upper traps and rhomboids.
Plus, the W-raise specifically isolates the rear deltoids for better mobility and healthier shoulders.
How to Do the TRX YTW
- Take a firm grip on the handles below shoulder height and walk your feet into your desired placement.
- Keeping your shoulders down and chest up, pull your arms into a Y shape overhead and slowly lower down.
- Then pull into a T shape with your palms facing away from you and slowly return to the starting position.
- Perform a face pull and externally rotate the shoulders into the W position. That’s one rep.
Coach’s Tip: Pace yourself and don’t go to failure on the first or second portions of the YTW.
Benefits of the TRX YTW
- This exercise can be made more or less intense by moving your feet closer or further away from the anchor point.
- Trains the upper back from different angles for better upper back muscle development
- A great way to correct poor posture and for overhead athletes who need to keep their shoulders healthy.
TRX Inverted Row
The barbell inverted row is a bodybuilding back staple, but it locks your grip into a specific position. If you need a more fluid grip to get around any shoulder discomfort, enter the TRX.
With the TRX inverted row you can go underhand, overhand, neutral, or anything in between to accommodate any potential wrist, elbow, or shoulder issues. The instability of the TRX will improve your core stability and train your stabilizing muscles more than the barbell version.
How to Do the TRX Inverted Row
- Grab the handles with your preferred grip and hang down directly under the frame.
- Then, engage your glutes and upper back to form a straight line with your torso.
- Pull your body up to the handles just below your chest and lower slowly back down until your arms are straight.
Coach’s Tip: You can place your feet on a low elevated surface to increase the difficulty of the exercise.
Benefits of the TRX Inverted Row
- The customizable grip works around joint issues and trains the upper back from different angles.
- The TRX handles help train the core while you’re working your back.
- The padded handles make it easier on your grip, giving you the ability to do more reps.
Power Clean
If you want to mix some athleticism into your upper back training, look no further than the power clean. This Olympic lifting accessory movement will absolutely thrash your traps and help you develop explosive force generation and improve your bodily coordination.
As a bonus, you’ll break a real sweat stringing a few power cleans together as well. There’s a small learning curve to the clean — and you need solid mobility in your shoulders to nail the front rack position — but few movements engage your traps as much as a good power clean.
How to Do the Power Clean
- Stand with your feet under your hips, shoulder-width apart, about an inch away from a loaded barbell.
- Crouch down until you can grab the bar with your hands just outside your shins. Allow your knees to drift forward in front of the bar. Flatten your pack and pull your chest up.
- Relax your arms completely and push into the floor with your legs. Allow your knees to drift out of the way of the bar as it glides upward.
- Once the bar is around mid-thigh, drive into the floor hard with your legs, extend your hips, and shrug your shoulders.
- Once the bar is in motion, lift and plant your feet in a wider stance than when you started. Flip your elbows under and around, and catch the bar in an athletic partial squat position.
Coach’s Tip: Try to synchronize the bar coming into the front rack with your feet hitting the ground.
Benefits of the Power Clean
- The aggressive shrugging motion engages your upper back.
- Great for developing total-body power and coordination.
- Power cleans are easier to learn than full cleans or snatches, so you spend less time practicing and more time training.
Rack Pull
More weight isn’t always better, but when it comes to building a sick pair of traps, it definitely is. Your traps can take quite a beating, so it pays dividends to test them with exercises like the rack pull.
You can think of rack pulls as, essentially, partial-range-of-motion deadlifts. Load up a barbell around knee height (you can rest it on the safety bars of a squat rack, for instance) with more weight than you can deadlift, and then pull. That’s it. Your upper back will be screaming.
How to Do the Rack Pull
- Set a barbell just above knee height either in a squat rack or on a pair of blocks.
- Assume a conventional deadlift stance with your feet close together and your hips hinged back.
- Grab the barbell tight with both hands and push hard into the floor.
- Use your glutes and quads to bring yourself to a standing position. Let your shoulders hang down and really stretch out your traps.
Coach’s Tip: You can widen your grip on rack pulls to alter the stimulation and give yourself some extra grip work for free.
Benefits of the Rack Pull
- Provides tremendous mechanical tension to your traps.
- Serves as a good deadlift accessory exercise.
- Easy to set up and perform in almost any gym.
Band Pull-Apart
Not every upper back exercise needs to be hard and heavy. That region of your back is actually made up of many, many different small muscles, some of which require a more delicate touch if you want them to grow.
You can grab a resistance band and stimulate the muscles that attach to and affect your scapula, such as the posterior deltoid or supraspinatus, by performing pull-aparts. This exercise offers targeted muscular stimulation without having to turn to heavy weights.
How to Do the Band Pull-Apart
- Grab ahold of a resistance band with a slightly-wider-than-shoulder-width grip and hold it aloft in front of your body with your arms straight.
- From here, pull your arms out to each side as though you were going to tear the band apart.
- Spread your arms until they’re in line with your torso, hold for a beat to feel your upper back contract, and then return to the starting position.
Coach’s Tip: Pull the band apart and slightly downward to better engage your rear delts.
Benefits of the Band Pull-Apart
- Commonly used in clinical settings as a shoulder prehab or rehab exercise.
- You can store a resistance band easily in your gym bag.
- Great for warming up your shoulders before a heavy pressing workout, or at the end of a long back day.
Importance of Upper Back Training
The upper back muscles of the rhomboids and the trapezius are responsible for many of the movements of the scapula which in turn plays a huge role in the stability and mobility of the shoulder. Movements including scapular retraction, scapular protraction, scapular upward rotation, scapular downward rotation, and scapular elevation are enabled by your upper back muscles.
If the upper back is either weak or stretched (rounded shoulders) or tight and inhibited, it will affect the ability to go overhead and other parts of the body will compensate for the lack of shoulder mobility. Simply put: a weak upper back can result in poor form, and poor form can possibly lead to injuries.
View this post on Instagram
As for strength and performance, your upper back muscles are what initiate almost all pulling motions, so a stronger upper back will result in more pulling strength and force. This means that you can do more reps (and more explosive reps) for pulling exercises, which will result in a bigger and stronger back. Also, powerlifters and strongmen need a larger upper back to support a loaded barbell during squats and as a base for when they’re bench pressing.
The Benefits of Training Your Upper Back
Upper back strength and size plays a role in posture, strength, and spinal stability. Here are the main benefits you can reap from targeting your upper back muscles.
Builds a Stable Base
During the squat, the upper back provides a place for the bar to sit, and keeping the upper back tight prevents you from leaning too far forward in the squat and turning the movement into a good morning.
During the bench press, the upper back provides the foundation on which to press. By keeping the upper back engaged, it supports and controls the bar path, allowing for good technique and — hopefully —pressing more weight.
Strengthened Posture
The muscles in your upper back are responsible for pulling your shoulder blades together. Most people spend way too much time sitting down or curled over, and as such, those muscles may grow weak over time.
It’s a cyclical issue where hunching causes weak muscles and weak muscles enable hunching. Being hunched over for long periods of time can also cause back pain and impede shoulder mobility. And decreased shoulder mobility can lead to poor form and, as a result, injury.
By strengthening the upper back muscles, you’re enabling better posture and therefore better pulling and overhead pressing form (due to increased shoulder mobility).
Anatomy of the Upper Back
Your upper back has important muscles and understanding what they are and how they work is important in obtaining a stronger, better-looking upper back. Here’s a breakdown of the major upper back muscles.
Rhomboids
The rhomboids originate from the cervical (neck) vertebra and run diagonally down the back and attach to the inside of the scapula. Their functions include adduction, inward rotation of the arms, and scapular elevation.
Trapezius
The trapezius is a large flat triangular superficial muscle that sits on both sides of the upper back. It originates from the cervical spine and all 12 of the thoracic vertebrae. The traps main functions include scapular adduction, elevation, depression, and outward rotation.
Rear Deltoid
Your shoulder muscle (as in, the deltoid) is made up of three distinct compartments. The posterior deltoid sits on the back of the meat of your shoulder and is the smallest of the three sections, but may be the most critical to train.
This small muscle helps maintain stability within the shoulder capsule, particularly when you perform pressing movements. Neglecting your rear delts may come back to bite your performance down the line. They’re more difficult to target than your front or side delts, but every rep is worth it.
How to Warm Up Your Upper Back Before Training
Before doing any exercises that involve the upper back, it’s important to get blood flow there and then mobilize it with a few low-intensity exercises to help get your upper body in good exercise positions.
Starting off with foam rolling the upper back with arms overhead and with the scapula spread apart will drive blood there and work out some tight and sore spots. Then, performing a few low-intensity upper back exercises like the TRX YTW, face pulls, band pull-aparts, and wall slides will have your upper back ready to roll.
More Upper Back Training Tips
Now that you have a handle on the best upper back exercises to strengthen your entire upper back region you can also check out these other helpful back training articles for strength, power, and fitness athletes.
- 4 Challenging Pull-Apart Variations For A Stronger Upper Back
- 4 Single Arm Row Variations To Build A Serious Upper Back
Featured Image: Rawpixels.com / Shutterstock