
Big biceps signal to the world that you’ve put in some serious sweat equity at the gym. The biceps are small muscles, but growing them takes time, knowledge, and intelligent programming. But the biceps don’t just look good — they serve a real function. The next time you pick up your kid or perform a perfect pull-up, that’s your biceps at work.
The good news for you is training the biceps is pretty simple — you curl, curl, and curl some more. That said, certain exercises get the job done better than others.

To help you figure out which is best for you, we’ve culled 20 of the best biceps exercises into one list. You’ll also get more info on the muscle itself and learn how to incorporate biceps training into your routine.
Best Biceps Exercises
- Barbell Curl
- Chin-Up
- EZ-Bar Preacher Curl
- Hammer Curl
- Incline Dumbbell Curl
- Facing-Away Cable Curl
- Reverse-Grip Bent-Over Row
- Cable Curl
- Concentration Curl
- Cable Concentration Curl
- High Cable Curl
- Cable Rope Supinating Curl
- Cable Hammer Curl
- Dual Cable Preacher Curl
- TRX Suspension Curl
- EZ-Bar Reverse Curl
- Spider Curl
- Zottman Curl
- Arnold Curl
- Curl 21
Editor’s Note: The content on BarBend is meant to be informative in nature, but it should not be taken as medical advice. When starting a new training regimen and/or diet, it is always a good idea to consult a trusted medical professional. We are not a medical resource. The opinions and articles on this site are not intended for use as diagnosis, prevention, and/or treatment of health problems. They are not substitutes for consulting a qualified medical professional.
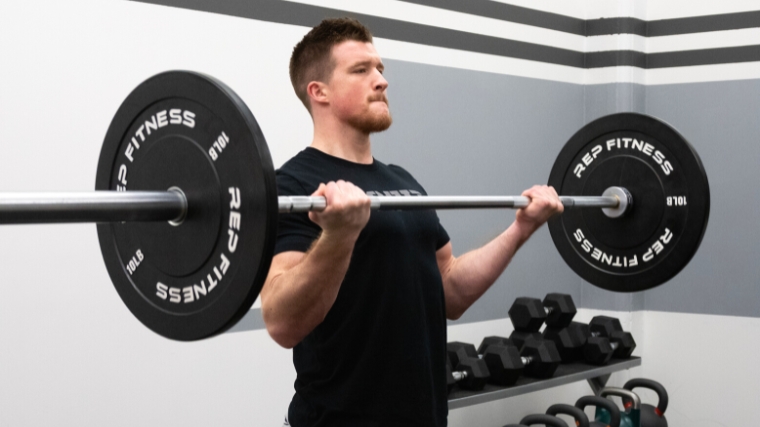
Barbell Curl
The barbell curl is a classic biceps-builder. This exercise targets the biceps and can add serious size and strength to the entire muscle when done correctly. You can curl more weight with the barbell curl than other curl variations as you’re lifting a singular implement with both hands.
It’s also straightforward to do. Simply load up a barbell, hold it in both hands, and lift it toward your chin. Rinse and repeat.
How to Do the Barbell Curl
- Grab a barbell with an underhand grip, slightly wider than the shoulders.
- Pull your shoulders back into their sockets to expose the fronts of your biceps. Your elbows should be under your shoulder joints, or slightly in front by your ribs.
- Curl the barbell up using your biceps.
Coach’s Tip: Make sure not to let your torso lean forward, shoulders collapse forward, or elbows slide backward to the side of your body. Instead, they should stay slightly in front of your shoulders.
Sets and Reps: With moderate to heavy weight, do three to four sets of six to 12 reps.
Benefits of the Barbell Curl
- It’s simple and effective. The barbell curl offers a small learning curve. It’s perfect for beginners but more advanced lifters will still benefit from the basic mechanics.
- You’ll build stronger biceps more quickly as you’re able to load your biceps with more weight.
Chin-Up
The chin-up is a bodyweight exercise that can induce serious muscle growth of the biceps (and back) with nothing but a pull-up bar. If you have a door-mounted pull-up bar in your home gym, then that’s all you need to bang out sets of chin-ups.
Since the lifter pulls their own body weight, the biceps are usually exposed to loads heavier than one can lift with a barbell. However, lifters may perform these incorrectly, engaging their shoulder and grip muscles. Make sure you’re keeping your emphasis on your biceps by engaging your core and pulling your shoulder blades back and down.
How to Do the Chin-Up
- Hang from a bar with palms facing you and your hands about shoulder-width apart or slightly wider.
- Squeeze your shoulder blades together from a dead hang.
- Pull your body up, making sure not to let your body fold inward until your chin is at or above the bar.
Coach’s Tip: Imagine drawing your elbows down and back slightly into your back pockets.
fSets and Reps: Using a resistance band to assist you if needed, perform three to five sets of as many reps as possible.
Benefits of the Chin-Up
- To do a chin-up, you only need access to a pull-up bar, making it one of the more accessible movements on this list.
- You’ll lift your entire body weight, taxing your biceps with more weight than you can typically curl.
- Your grip and shoulders will also gain significant strength.
EZ-Bar Preacher Curl
Curling on a preacher bench lengthens the exercise’s range of motion. As a result, the biceps will be under tension for a longer period of time, which usually equates to more muscle growth.
Using an EZ bar, which turns your hands inwards, makes the move more comfortable on your wrists. It also shifts the angle of the exercise to target different muscle fibers in the biceps.
How to Do the EZ-Bar Preacher Curl
- Sit down on a preacher bench and rest the back of your triceps on the pad. Set your body in the same position as the standard barbell biceps curl.
- Grasp the EZ bar handle on the inner angled pieces. This will place your hands slightly narrower than shoulder-width and on a semi-supinated angle.
- Curl the bar upward by flexing your biceps. Briefly pause at the top of the curl and squeeze your biceps. Lower the weight under control.
Coach’s Tip: Keep your body locked into place throughout each rep.
Sets and Reps: With a moderate to heavy weight, perform three to four sets of eight to 12 reps.
Benefits of the EZ-Bar Preacher Curl
- Using the preacher bench creates a longer range of motion and therefore more muscular tension for more biceps growth.
- The EZ bar is more comfortable on your wrists, allowing you to focus on your muscles.
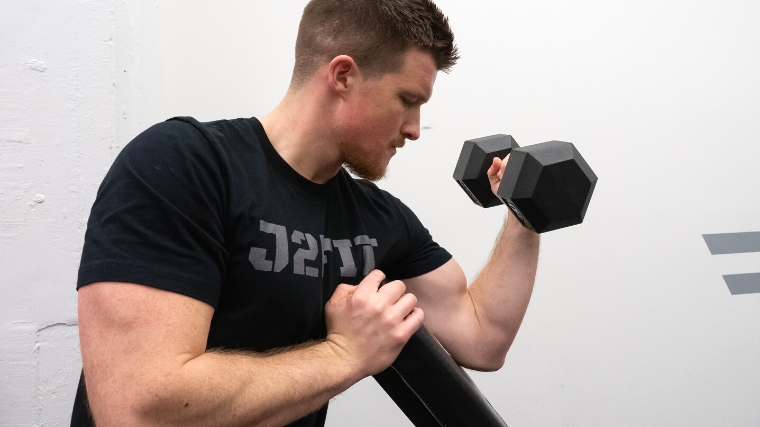
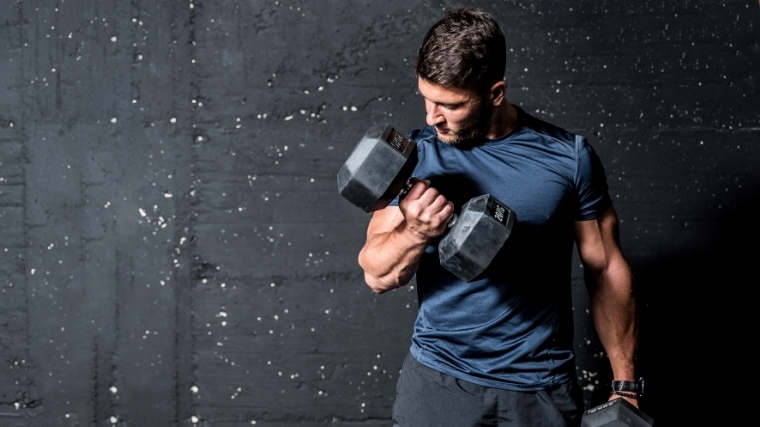
Hammer Curl
The hammer curl has the lifter curl dumbbells with their palms facing each other. This neutral wrist position is more comfortable and allows the lifter to hoist more weight, as athletes are generally stronger with a neutral-grip position.
This move also targets the biceps brachialis and brachioradialis (outer biceps and forearm) for more arm thickness. This will be advantageous whether you’re looking to build out your physique or craft a strong grip to support massive deadlifts.
How to Do the Hammer Curl
- Hold a dumbbell in each hand while standing.
- Turn your wrists so that they’re facing each other.
- Keep your arms tucked in at your sides and flex your elbows to curl the dumbbells up towards your shoulders. Lower them back down with control.
Coach’s Tip: Focus on squeezing your biceps at the top of each rep to make the most of this move.
Sets and Reps: With moderate to heavy weight, do three to four sets of eight to 12 reps.
Benefits of the Hammer Curl
- The neutral wrist position is more comfortable.
- You can lift more weight with the hammer curl, so, over time, you accumulate more muscle-building volume.
- The hammer curl targets the inner biceps muscle and the forearm to build denser arms.
Incline Dumbbell Curl
To perform the incline dumbbell curl, you’ll need to lie back on an incline gym bench. Curling from an incline takes the momentum out of the equation so that the lifter can’t cheat the weight up.
Secondly, curling with lengthened, extended arms creates a longer range of motion, ultimately making this curl variation more effective.
How to Do the Incline Dumbbell Curl
- Lie back on an incline bench, angled at about 60 degrees, with a dumbbell in each hand. Let your arms hang so they’re fully extended.
- Curl the weight up without moving your shoulders.
- Hold at the top of the movement for about a second, then slowly lower the dumbbells with control.
Coach’s Tip: Maintain contact between the backs of your shoulders and the bench.
Sets and Reps: With moderate weight, perform two to three sets of eight to 15 reps.
Benefits of the Incline Dumbbell Curl
- The incline dumbbell curl eliminates momentum, forcing the lifter to maintain a strict curling form.
- Lifting with extended arms increases the exercise’s range of motion for more muscular tension.
Facing-Away Cable Curl
To perform the facing-away cable curl, the lifter needs to stand facing away between the two cables of a functional trainer or cable tower. You won’t be able to see the cable stack, but you’ll be able to see the gains.
This setup allows you the same benefits of the incline dumbbell curl — a greater stretch due to a longer range of motion — coupled with the unique resistance of the cables, which keeps tension on the muscle throughout the entire movement.
How to Do the Facing-Away Cable Curl
- Set the handles of the cable pulleys to the lowest setting and attach D-handles to each pulley. Pick up a handle in each hand.
- Tense your upper back and let your arms hang so they’re fully extended.
- Curl the weight without moving your shoulders. Hold the top of the movement before slowly lowering the handles with control.
Coach’s Tip: Step away from the cable stack far enough to feel resistance from the cables but not enough to lose structural integrity across your body.
Sets and Reps: Using weight that’s challenging but doesn’t pull you off balance, perform two to four sets of 15 to 25 reps.
Benefits of the Facing-Away Cable Curl
- Barbells lock your arms in place. Cables are mobile. Curling with cables lets the lifter line up the resistance with their preferred arm path — allowing for less discomfort throughout the movement.
- Curling with the cables set behind you increases the movement’s range of motion while using cables creates more tension for a one-two punch of more overall muscle stimulus.
- This movement is great for challenging the biceps and loading them in their lengthened range — a range that doesn’t get loaded enough.
Reverse-Grip Bent-Over Row
You’re right to think of this movement as a traditional back exercise. It is. That said, similar to the chin-up, the supinated grip of this bent-over row variation involves the biceps to a great degree.
You can manage more weight on the barbell compared to other biceps exercises. Also, you’ll build up your biceps in conjunction with your back muscles for more overall muscularity.
How to Do the Reverse-Grip Bent-Over Row
- Grab a barbell with an underhand grip that is about shoulder-width apart.
- Assume the proper bent-over row position, with the back flat and chest up.
- Row the barbell to your stomach. Pull with both your back and arms, lowering the weight under control and repeating for reps.
Coach’s Tip: You can use very heavy weights here. Load up the bar, but make sure you’re not throwing your weight around to cheat each and every rep.
Sets and Reps: With heavy weight, perform three to four sets of six to eight reps.
Benefits of the Reverse-Grip Bent-Over Row
- The reverse-grip bent-over row targets your back muscles in addition to your biceps.
- You can lift more weight compared to other biceps moves.
Cable Curl
When you curl a dumbbell or barbell, the movement is hardest at the midpoint of the lift since the weight is furthest from the body. However, cables keep tension on the muscle throughout the movement, as the weight stack you’re lifting is suspended throughout.
This adds more tension to the muscle for more growth. You can also attach different handles to a cable machine’s pulley to attack your biceps from different angles.
How to Do the Cable Curl
- Attach the desired handle to the pulley of a cable machine set to the lowest height.
- Grab the handle in both hands and take a few steps back so there’s constant tension on the cable (the weight stack should be elevated the entire time).
- Curl the bar up to your chest and then slowly lower it back down.
Coach’s Tip: Focus on setting up the angles of your body and the machine to ensure that the line of pull from the cable lets you focus intently on your muscle contraction.
Sets and Reps: With light to moderate weight, perform two to three sets of 15 to 25 reps.
Benefits of the Cable Curl
- Curling with a cable loads the biceps with constant tension throughout the movement.
- You can target your biceps from different angles by using different handles on the cable machine.
- Cable curl variations typically require less weight to be effective (since the tension is greater throughout the range of motion), so this exercise is a bit friendlier to your elbow joints.
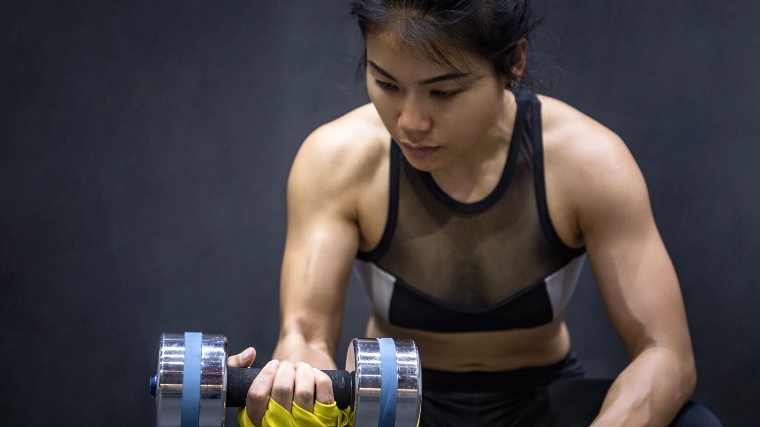
Concentration Curl
The concentration curl is all about feeling your biceps work. You sit down on a bench, rest your elbow on the inside of your thigh, and curl a dumbbell from full extension to contraction.
Lifting with one arm at a time means you’re doing more overall work. Plus, you’ll allow your weaker arm to play catch-up with your dominant arm. The isolated curling position really lets you hone in on your biceps as you curl a light dumbbell.
How to Do the Concentration Curl
- Sit on a bench with your feet set wide enough to allow your arm to hang in the middle, with your elbow resting on the inside of the thigh.
- Slowly curl a dumbbell upward at a controlled tempo, concentrating on contracting the biceps to move the load. At the top of the movement, flex as hard as possible.Lower the load slowly.
Coach’s Tip: The key is not to lose tension on the biceps at any point in the range of motion.
Sets and Reps: Use moderately heavy weights and perform two to four sets of eight to 12 reps per side.
Benefits of the Concentration Curl
- The ability to focus more intently on your biceps.
- More calories are burned as you’re working one side of your body at a time, which effectively doubles the number of sets you’re doing.
- By focusing on one arm at a time, your weaker side will get stronger.
Cable Concentration Curl
As you may have deduced by now, replacing any free weight with cables is a great way to level up an already effective movement.
Subbing cables for dumbbells for a set of concentration curls means more tension along with the same existing benefits of the movement — isolation, unilateral focus, and biceps that Arnold Schwarzenegger would be jealous of (not really, but it’s good to set the bar high).
How to Do the Cable Concentration Curl
- Stand in front of a single cable on a functional trainer or cable tower. With the cable set around chest height, grab the handle with a supinated grip (palm facing up), and slightly lean your torso forward.
- Keep tension on your biceps all through the curl to the top of the movement.
- Slowly lower the load.
Coach’s Tip: Your working arm should be angled across the body while you curl the handle toward the opposite ear.
Sets and Reps: Using moderately heavy weight, perform two to three sets of 12 to 20 reps per side.
Benefits of the Cable Concentration Curl
- The ability to focus more intently on the short head of your biceps.
- By focusing on one arm at a time, your weaker side will get stronger. It also allows you to add variety to your exercise selection by using cables.
- The use of cables over dumbbells alters the resistance profile, changing where the tension is greatest within the exercise.
High Cable Curl
This high cable curl variation has the lifter curling the cables while their shoulders are flexed and palms are facing up (supinated). The cables will be set just above shoulder level while performing this exercise on a functional trainer or cable tower.
Curling from a high, extended arms position is thought by many to target the shorter biceps head, which is what creates that coveted biceps peak.
How to Do the High Cable Curl
- Set a cable pulley to about shoulder height and attach D-handles to each pulley.
- Stand between the pulleys and raise your arms to shoulder level, keeping your upper arms parallel to the ground.
- Curl the handles toward your head, then slowly lower the load back to the starting position.
Coach’s Tip: Maintain your shoulder position throughout the range of motion, not allowing your elbows to dip. Keep tension in your upper back to help keep shoulders stable and arm position constant, driving up tension in your biceps.
Sets and Reps: Use a weight that you can control while maintaining your upper arm position. Do two to three sets of 15 to 20 reps.
Benefits of the High Cable Curl
- The high cable curl gives the ability to focus and train both arms at once while still having a unilateral stimulus.
- Using cables over dumbbells allows for an altered arm path, creating new stress on the biceps — challenging them in their contracted, shortened position.
- Cables offer accommodating resistance, maintaining constant tension on your muscles throughout the range of motion.
Cable Rope Supinating Curl
This low cable curl variation has the lifter curling with and twisting a rope attachment, prioritizing both functions of the biceps brachii muscle — supination and elbow flexion.
Because you’re standing farther away from the machine, your biceps will be under tension for the entire movement. Twisting your hands inward toward your face will create even more biceps tension (which you’ll absolutely feel).
How to Do the Cable Rope Supinating Curl
- Stand in front of a single cable on a functional trainer or cable tower. Set the cable to a lower setting with each side of the rope attachment in your hands (palms facing each other).
- Start the curling motion by flexing your elbows (bringing your hands up toward your shoulders).
- Rotate (supinate) your hands to face up about a third of the way into the curl.
Coach’s Tip: Make sure you’re waiting until you’re a third of the way into each rep to rotate your hands. This ensures the muscles responsible for supination can kick in while the resistance is on them.
Sets and Reps: With moderate weight, perform two to three sets of 15 to 20 reps.
Benefits of the Cable Rope Supinating Curl
- This move has the ability to train both primary functions of the biceps brachii — supination and elbow flexion.
- Using cables allows for consistent resistance across the entire range of motion.
Cable Hammer Curl
This variation, where you’ll lift two D-handles with a neutral grip, lets you lift more weight than a standard cable curl. You’ll curl the handles all the way up and down, keeping your hands in a neutral position.
Because you’re squeezing the handles hard, you’ll also activate a lot of the muscles in your forearms for a grip boost. To increase activation of the forearm muscles even more, you can add fat grips to the handles.
How to Do the Cable Hammer Curl
- Position the cables in a low setting on the cable stack.
- Grip each handle with a neutral grip (palms facing each other). Take a step back and engage the upper back to add stability to the upper body.
- Curl the weight up. Maintain a neutral grip (palms facing each other). Slowly lower the weight after you reach the top of the curl.
Coach’s Tip: Pay attention to your muscles here. Squeeze and contract once you reach the top of the movement.
Sets and Reps: Use a moderately heavy weight to perform two to three sets of 15 to 20 reps.
Benefits of the Cable Hammer Curl
- You’ll train muscles of the forearm — most notably the brachioradialis — and also muscles of the upper arm, like the brachialis and short head of the biceps.
- Using cables maintains a consistent level of resistance throughout each part of the exercise.
- This is a great variation to use as a part of a bigger biceps superset or giant set.
Dual Cable Preacher Curl
This preacher curl variation uses a dual cable setup on a functional trainer. The preacher curl comes with many benefits — namely, the opposing force created by the preacher bench.
The dual cable preacher curl adds the cables’ unique resistance to working with a preacher bench, allowing for accommodating resistance across the entire range of motion. This allows for more high-quality time under tension — a big key for muscle-building.
How to Do the Dual Cable Preacher Curl
- Set up a preacher bench roughly three to five feet away from a cable tower with two cable pulleys. Set the pulleys so they’re slightly lower than the bench. Sit on the preacher bench and have a training partner hand you both handles.
- Position your elbows so that they rest over the pad.
- Slowly lower your arms until your elbows are nearly locked out, then curl the weight back up.
Coach’s Tip: If you don’t have a training partner or coach to give you the handles, use your body’s momentum to shift the weight into the starting position for the first rep.
Sets and Reps: Use a moderate weight that you can control. Do three to four sets of 15 to 20 reps.
Benefits of the Dual Cable Preacher Curl
- The external stability from the bench gives you the support you need to focus on moving the weight without too much concern about form.
- Using cables provides a consistent level of resistance throughout the range of motion, which is a great muscle-building recipe.
- It can be used for a multitude of rep ranges, building muscle and strength in your biceps.
TRX Suspension Curl
This curl variation is great for anyone with limited access to free weights, cables, and machines. Like other suspension-based exercises, you can also easily adjust the difficulty of the exercise by adjusting your body position — the more upright your body position, the easier it will be.
Because you are only using bodyweight as your resistance, altering the rep tempo can increase the time under tension on your biceps.
How to Do the TRX Suspension Curl
- Secure the TRX suspension to an anchor overhead.
- Grab hold of the handles and take a few steps forward toward the anchor point.
- Lean back, keeping your spine neutral and your hips and shoulders aligned.
- Curl your body weight up.
Coach’s Tip: To increase the difficulty of the exercise, adjust your body position. The further you lean back, the more of your body weight you will resist during the movement. If you want to make the exercise easier, you can position your body to be more upright.
Sets and Reps: Perform three to four sets to failure, adjusting your foot position as needed.
Benefits of the TRX Suspension Curl
- You only need your own body weight for resistance here.
- The TRX suspension trainer can be taken anywhere, allowing you to train at home, the gym, or the park.
- You can easily scale this movement to your needs and skill level simply by adjusting your feet.
EZ-Bar Reverse Curl
This exercise has the lifter use a semi-pronated grip on an EZ bar. To be semi-pronated in this context refers to the middle point between pronated (palms facing down) and neutral (palms facing each other). The shape of the EZ bar allows for this unique grip adjustment.
You’ll curl the bar up while maintaining your shoulder position and keeping your elbows to your side. The only movement should come from the forearm and biceps muscles flexing the elbow. This curl variation trains the forearm and upper arm muscles — most notably the brachialis and brachioradialis — helping increase size and bolster grip strength.
How to Do the EZ-Bar Reverse Curl
- Grip an EZ bar with each hand with your palms facing down (or best fit to the slanted part on the bar).
- Keep your arms tucked in at your sides.
- Flex at your elbows to curl the bar up towards your shoulders. Lower the bar back down with control.
Coach’s Tip: Take a moment to find the optimal grip for your limb length and hand size before starting your sets in earnest.
Sets and Reps: Use a moderate weight and perform two to four sets of eight to 15 reps.
Benefits of the EZ-Bar Reverse Curl
- This move forces your biceps and forearms to work very hard.
- Cambered EZ bars are easy to find in gyms across the globe, so it’s a relatively accessible curling variation.
- This variation can train and add size to the forearms.
Spider Curl
If you’re afraid of the creature this biceps curl variation is named after, don’t worry — no arachnids need to join in the fun. Instead, you’ll be channeling their energy by making your arms as long as possible as you set up for your curl.
You’ll be in roughly the same position as with an incline prone row, lying on your chest on an incline bench. You can use dumbbells, a barbell, or an EZ bar. Whichever you choose, take advantage of the external support to channel every ounce of energy toward your biceps.
How to Do the Spider Curl
- Set up an incline bench so that when you lie on it face down, your arms can just barely reach weights on the ground. (Use stable weight plates to raise the bench if needed.)
- Lie on the bench facing the ground, with your chest supported and your head extending over the top.
- Reach down to grab your chosen implement securely then reestablish a stable starting position.
- Curl the implement using only your biceps, avoiding any momentum.
Coach’s Tip: Bear down on your core as you prepare for each rep. This will allow you to focus as much as possible on your biceps during the lift itself.
Sets and Reps: Use a moderately heavy weight, aiming for two to three sets of eight to 10 reps. Hit failure with each set.
Benefits of the Spider Curl
- By lying on a bench, you’ll externally stabilize your body. This leaves all your energy for your biceps.
- Your arms will be fully extended at the bottom of each rep, so you can move through your entire range of motion.
- Since you’ll be externally stabilized, you can safely load this up fairly heavy for added stimulus.
Zottman Curl
If you want to build bigger biceps, you need forearms that can support all that extra weight. Enter the Zottman curl — your new go-to for building both forearms and biceps.
It might take you a minute to get used to the movement pattern here. But once you’ve gotten the hang of the rhythm, you’ll feel your forearms fighting on the eccentric while your biceps fire up on the concentric portion. A win-win for bigger all-around arms.
How to Do the Zottman Curl
- Take hold of the dumbbells with your palms facing up. Curl as usual.
- Rotate your hands so that your palms are facing down once you reach the top of your rep.
- Lower the weights slowly and with control. When your arms lengthen, rotate your hands again so your palms are facing up.
Coach’s Tip: Move as slowly as you can manage on the eccentric portion. Squeeze your biceps hard at the top of each rep.
Sets and Reps: Use a weight that you can control with a reverse grip on the way down. Perform two to three sets of six to 10 reps with a very slow eccentric (lowering) phase.
Benefits of the Zottman Curl
- This movement will emphasize your forearms during the eccentric portion, which is key for forearm growth.
- The Zottman curl trains both your forearms and biceps directly within the same rep.
- Because you’ll be pausing at the top to rotate your palms, you’ll get an extra cue to squeeze your biceps.
Arnold Curl
When you set up to do the Arnold curl, you gym buddies might look at you like you’re doing it wrong. The atypical set-up may have you doubting whether you’re lifting correctly, too.
But if you’re maintaining a neutral torso and keeping your upper arm perpendicular to the ground, you’re likely in good shape. Make sure you’re using a lighter weight than your ego might call for to ensure that you can maintain this position through each rep.
How to Do the Arnold Curl
- Set up an incline bench at an angle somewhere between the set up for a seated overhead press and an incline bench press.
- Stand behind the bench and brace the forearm of your free hand across the top of the bench. Stagger your feet (with the foot on the side of your curling arm further back).
- Lean forward as you do for a single-arm dumbbell row. Hold the dumbbell with your hand hanging perpendicular to the floor.
- Curl from this position, keeping your upper arm perpendicular to the ground.
Coach’s Tip: Use a lighter weight at first to make sure you’re able to maintain a steady, stable upper arm throughout all your reps.
Sets and Reps: With moderate weight, perform two to three sets of 10 to 12 reps with control.
Benefits of the Arnold Curl
- Your entire body will be braced throughout the effort, giving your whole body attention during this single-joint move.
- The Arnold curl forces you to pay attention to your upper arm position, which increases your mind-muscle connection to your biceps.
- Your position will force you to focus on breathing, which can help you eke out more efficient reps.
Curl 21
The 21s method isn’t a lift in and of itself, but we’d be remiss if we didn’t put it on a list of biceps-builders. You can perform nearly any biceps movement with this method — and it’s a real arm developer.
You’ll take advantage of partial range of motion training for 14 of your 21 reps here. The final seven reps — true scorchers — will have you move through the entire range of motion. This means you’ll be hitting your biceps at all ranges.
How to Do the Curl 21
- Set up with a barbell or dumbbells as you would for a standard curl.
- Perform seven half reps, only raising the weight to 90 degrees.
- Do seven more half reps, this time moving between 90 degrees (the midway mark of a traditional curl) and the top end of the range of motion.
- Perform seven more standard reps, moving the weight through the entire range of motion.
Coach’s Tip: Avoid using any momentum or swinging motions, regardless of fatigue level. Use a lighter weight if you find yourself cheating every or most reps.
Sets and Reps: Do one or two sets of a single rep. Each “rep” here comprises 21 reps — 14 with a partial range of motion and seven with a full range of motion.
Benefits of the Curl 21
- Each “rep” is comprised of 21 repetitions — so even one or two sets will give you a high training volume.
- You’ll perform 14 reps at a partial range of motion and seven with a full range, so you’ll be getting ample practice at both types of lifts.
- This method of training teaches you to move without any momentum, which is critical for biceps growth.
Biceps Warm-Up
When you think of biceps workouts, you probably don’t think of doing a specific warm-up. But devoting some time and energy to priming your biceps specifically can go a long way toward reducing injury risk. You’ll increase the blood flow to the surrounding tissues — your elbows and joints — prepping your biceps for action.
- Seated Biceps Stretch: 1 x 30-45 seconds per side
- Wrist Roll: 1 x 30-45 seconds per direction
- Kneeling Forearm Rock: 1 x 30-45 seconds
- Exercise-Specific Ramp-Up Set: 1-2 x 8 reps
Even though you don’t max out on biceps exercises, you’ll be doing one or two ramp-up sets for each movement. This helps ensure that your elbow joints are ready to move in the particular pattern required by each separate exercise.
How to Train Your Biceps
As for how often to train your biceps, you want to aim to get in about 10 to 14 total sets per week. If you’re a gym newbie, start with eight sets per week. The biceps are small muscles with only two primary functions, so they don’t require a hefty amount of work to spark growth.
One option for training your biceps is to pair them together with your triceps. These are antagonistic muscles — your biceps flex your elbows and your triceps extend your elbows).
You can also save your biceps training for after your back workout. If you follow a push, pull, legs split, you might opt to do biceps exercises after your pulling day. Since your biceps are recruited in most upper-body pulling movements, it makes sense to tack them onto that day since they’ll already be a bit fatigued.
Exercise Selection
Choosing the right exercise for the goal is like picking out the right tool for the job — it’s vital to your success.
You’ll need to do a little math to figure out how many exercises to train per session. Say you train your biceps twice per week at the max set recommendation of 14. You’ll perform seven sets of biceps work per workout. You could do three exercises, performing three sets for the first two and two higher-rep sets on the third exercise. Typically, aim to do three to four sets per movement.
When choosing exercises to perform, you want to pick exercises that:
- Give sufficient load to the muscle without excessive stress on the surrounding joints.
- Line up the resistance with the muscle(s) you want to train.
- Allow you to train around pre-existing injuries or limitations.
- Can be performed with the equipment in your gym space.
When it comes to training the biceps, dumbbells and cable variations typically rank over fixed-barbell ones due to the ability to adjust your setup and technique to your structure. Bottom line: if it causes you joint pain, there is most likely a better exercise to use to get the job done.
Sets and Reps
You’re not going to max out with your exercises for biceps. But that’s not to say you’re not going to go hard. You can use fairly heavy weights when you’re looking to amp up your strength. But remember to challenge yourself even with the relatively light weights you’ll use to build endurance.
- For Strength: Do three to six sets of six to eight reps with heavy weight.
- For Muscle Growth: Do three to six sets of six to 12 reps with moderate weight.
- For Endurance: Perform three to five sets of 12-20 reps with low to moderate weight.
Total Volume and Frequency
Training volume refers to the amount of exercise or work performed over a given period of time, whether that’s the training session or a week of training. Frequency refers to how often you are training a specific muscle group each week.

Eight to 14 sets per week is often a great starting point for anyone looking to grow their biceps. More advanced trainees could potentially exceed 14 sets per week if their goal is to grow their stubborn biceps. Remember that you will also have overlapping volume from other exercises, like pulling movements when training your back.
There is a limit to how much you can do per workout while still being productive. If you notice your performance dropping off, it may help to split up some of the training volume to a day later in the week. A training frequency of two to three sessions a week has been recommended to help maximize muscle growth. (1)
Biceps Training Tips
Your biceps play an important role in everyday life and play a pivotal role in upper body training — most notably back training. When training your biceps to grow or get stronger, there are a handful of rules that can help you improve your performance while limiting the risk of injury.
Stabilize
Establishing tension in the upper back (between the shoulder blades) during the setup of an exercise can help add stability to your upper body during biceps exercises. Increased stability — external (outside the body) or internal (inside the body) — can help you produce more significant tension during an exercise, leading to increased performance and more quality training volume.
Train Through a Full Range of Motion
To reap the full benefits of training the biceps (or any muscle), you need to ensure you fully contract the muscle by lifting through a complete range of motion. Different exercises present slightly different angles and ranges of motion — but a general rule of thumb is to fully extend your arm and then curl the weight to your deltoid.
The equipment you use matters, too. Free weights (barbells and dumbbells) usually tax the biceps in their mid-range position, as these tools are heaviest when they’re farthest from the body.
Exercises that utilize cables provide the most even form of resistive tension, applying the resistance directly in line with the cable itself. They also allow you to adjust the height of the handle or attachments, further manipulating the resistance.
Machines have a fixed resistance profile (where the exercise hits peak resistance within the range of motion) due to how the machine is built. Depending on the machine — or your body position in a cable variation — the resistance can be shifted away from the mid-range and more toward the extremes, adding variety and versatility to your training.
To maximize your biceps training, you should utilize a multitude of training methods, including free weights, cables, and machines.
Keep Your Elbows Fixed
A common mistake in biceps training is allowing the elbows to create unintentional momentum and shoulder movement by not remaining fixed throughout the exercise. Unnecessary elbow movement can take focus away from your biceps and your overall upper body stability while potentially leading to a higher risk of injury.
Use Momentum — Sometimes
If your goal is building muscle and strength — and even endurance — creating and maintaining significant amounts of tension in the target muscle(s) is imperative for stimulating positive muscular and neural adaptations.
When you generate momentum, you set yourself up for bypassing the part of the rep that places the most significant amount of tension on the muscle — working against the ultimate goal.
So, is it ever appropriate to create momentum within an exercise? It absolutely is. At the tail end of a hard set, momentum can help you squeeze out another rep or two. You can use momentum during high-load strength-based training and low-to-moderate load power training to help drive neuromuscular adaptations that help build strength and power.
If your goal is to grow your biceps, start the exercise slowly and then accelerate through the rest of the rep — squeezing through the tension and creating a solid contraction in the biceps.
Benefits of Training Your Biceps
Your biceps are glamorous muscles — at least, you might want them to be. If you’re looking for round, peaking biceps, the benefits of training them might seem obvious. But even if you aren’t motivated by a particular aesthetic, strong biceps can help you with your bigger lifts.
Support Compound Lifts
If you want to build a strong, powerful back, you’ll need strong, powerful biceps. Whenever you’re doing any kind of rowing motion, you need biceps strength to support all that weight.
Your back should be doing most of the work during heavy rows. But if your biceps are too weak to assist, your back gains will plateau before they’ve even gotten started.
Strengthening your biceps is tremendously important for supporting those back-builders. But they’re important for heavy pushing movements, as well. If you love bench pressing, your triceps are likely to get a lot of attention. Train your biceps to keep balance in your arms. This balance is crucial for fending off injury.
Functional Fitness
Big biceps aren’t just about ripping your shirt sleeves. Having strong upper arms also supports you through daily activities ranging from lifting up your kids to hoisting your grocery bags into the trunk of the car.
Your wrists and forearms benefit when you train your biceps, too. You need the muscles involved here for being able to maintain your grip throughout long training sessions that emphasize functional movements like farmer’s carries.
Physique Training
In addition to supporting your big lifts, training your biceps can support your big physique goals. If you want thicker arms, you need to work your tris — but there’s a limit to how much your shirt sleeves can bulge without a strong set of biceps.
Anatomy of the Biceps
The biceps are called brachii, which is Latin for “two-headed muscle of the arm” — representing the short head and the long head. The biceps attach across two joints — the elbow and the shoulder. Its core function is to flex the elbow and turn the wrist.
The biceps are small muscles, but they serve a pivotal function when you really think about it. Anytime you pick something up or press something overhead, you’re flexing your elbow (and therefore your biceps) to some degree.
Think about the last time you loaded a suitcase into an overhead compartment. To get your luggage overhead, you probably curled it to your chest before pressing it up. Small but mighty — that’s the biceps for you.
Aesthetically, the biceps are a coveted muscle. When someone asks you to make a muscle, you don’t roll up your pant leg and flex your calf or pull down your shirt collar to show off your traps — you flex your biceps. Many lifters desire that classic biceps peak, which is when the muscle juts upwards. Unfortunately, whether you have a more distinguished biceps peak or not may largely be determined by genetics, but you can grow the area — which will translate to a larger peak to some degree.
The Short Head
The short head of the biceps is positioned on the inside of the upper arm and attaches to the coracoid process of the scapula (the curvy part that shoots out under the collarbone), and inserts into the biceps tendon down near the elbow.
The short head is most known for its roles in elbow flexion and supination (the turning) of the forearm or wrist. (2) When people talk about the short head, they’re usually referring to the biceps peak.
The Long Head
The long head of the biceps is positioned on the outside of the upper arm. It attaches to the more shoulder-centric part of the scapula — where its tendon runs smoothly through a grooved notch in the humerus bone — and inserts into the biceps tendon near the elbow alongside the short head.
The long head also flexes the elbow and creates supination (the turning) of the forearm or wrist. (1) The longer head sits under your short head and, when trained, helps to create a thicker arm.
More on Biceps Training
You’re now equipped to crush the best biceps exercises out there. You even know how to select the most effective biceps exercises for your specific goals and experience level.
Since you’ve got biceps workout fever, here are some more biceps training articles to tide you over until your next training session.
- 10 Commandments of Biceps Training
- Biceps Workouts Worth Trying During Your Next Arm Day
- Try This Shoulder and Biceps Workout to Build Muscle
References
- Schoenfeld, B. J., Ogborn, D., & Krieger, J. W. (2016). Effects of Resistance Training Frequency on Measures of Muscle Hypertrophy: A Systematic Review and Meta-Analysis. Sports medicine (Auckland, N.Z.), 46(11), 1689–1697.
- Tiwana MS, Charlick M, Varacallo M. Anatomy, Shoulder and Upper Limb, Biceps Muscle. [Updated 2020 Aug 11]. StatPearls Publishing; 2021 Jan.
Featured Image: mrbigphoto / Shutterstock