
Training your lower body gives you a lot of room to stack weight plate after weight plate onto the bar. But unless you’re a pressing expert, upper body exercises might seem more humble. But pressing more weight overhead isn’t out of reach. Building your back, shoulders, and arms is a challenge, but very achievable for dedicated athletes.
The best upper body exercises may not seem fancy or foreign to you. You’ve likely done quite a few exercises on this list, perhaps as a regular part of your program. But are you doing them correctly?
If you’re reading this article, it’s safe to assume you want more in the upper body department. In the list below, we’re going to outline the 21 best upper body exercises, explain why they rock, and tell you how to execute them flawlessly. You’ll also learn all the tricks and tips you need to bring your upper body workouts to the next level.
Best Upper Body Exercises
- Strict Press
- Push Press
- Bench Press
- Bent-Over Barbell Row
- Hang Clean
- Weighted Dip
- Mix-Grip Pull-Up
- Chin-Up
- Push-Up
- Dumbbell Pullover
- Lat Pulldown
- Bear Crawl
- Inverted Row
- Overhead Triceps Extension
- Landmine Press
- Farmer’s Carry
- Incline Y Raise
- Chest-Supported Dumbbell Row
- Dumbbell Bench Press
- Incline Dumbbell Curl
- Reverse Curl 21
Editor’s Note: The content on BarBend is meant to be informative in nature, but it should not be taken as medical advice. When starting a new training regimen and/or diet, it is always a good idea to consult a trusted medical professional. We are not a medical resource. The opinions and articles on this site are not intended for use as diagnosis, prevention, and/or treatment of health problems. They are not substitutes for consulting a qualified medical professional.
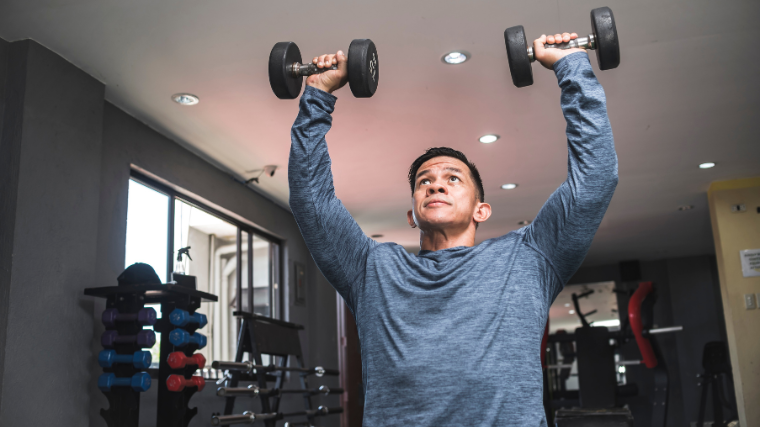
Strict Press
The strict press, or overhead press, uses the shoulders and arms to drive the weight overhead with no help from your lower body. Since you are not using momentum, you won’t be able to lift as heavy, but it’s great for building strength.
You can use dumbbells, kettlebells, or a barbell for the strict press. Lifting a barbell does require more shoulder mobility, so if that’s something you’re lacking, start with dumbbells.
How to Do the Strict Press
- Set a barbell in the rack at shoulder height. With your hands shoulder-width apart, grab the bar from underneath, letting it sit in your palms, and set it at the top of your chest.
- Tighten your core and push your chest out to create a strong base.
- Using only your upper body, move your chin out of the way and push the bar up in a straight line.
- Lock your elbows out at the top of the lift and slowly lower back to the starting position.
Benefits of the Strict Press
- If building upper body strength is your goal, the strict press is just about the best move you can perform.
- When hypertrophy is your goal, the strict press is also great for building muscles in the upper body, such as the deltoids, chest, and triceps.
- You’ll learn how to maintain a strong core brace under press.
Coach’s Tip: Warm up your rotator cuffs extensively before performing this lift.
Sets and Reps: Do three to four sets of four to eight reps.
Push Press
Like a strict press, the push press targets the shoulders, chest, and triceps muscles, but uses power and momentum to drive the weight. The push press uses a lower-body dip (think a quarter squat with knees going over toes) to push the barbell overhead.
The momentum from the dip lets you drive more weight over your head compared to a standard overhead press, and more load means more muscular stress for more muscle. Since you’ll also develop a lot of power from the push press, you can see CrossFit athletes implementing this into their workout to support other exercises, such as snatches and jerks.
How to Do the Push Press
- Start by assuming the same front rack positioning as you would for a jerk or front squat and have your wrist and shoulders aligned with a shoulder-width grip.
- With an upright torso, dip a few inches downwards, driving your knees over your toes. Then push your torso and chest upwards through the barbell.
- Using your legs, forcefully drive yourself upwards until the barbell is locked out overhead.
- Slowly lower down and repeat.
Coach’s Tip: Make sure you’re keeping your core engaged as you transfer force from your lower body to your upper body. The more efficiently your core can transmit force, the better your lift will be.
Sets and Reps: Perform two to four sets of four to eight reps.
Benefits of the Push Press
- It builds more total-body strength and muscle because you’re using force from the ankles, knees, and hips to help push the weight overhead.
- You’ll improve your overall overhead pressing abilities, which helps in your workout and your daily life.
- With more strength in your shoulders, there is a reduced risk of injury when lifting.
Bench Press
Along with the aesthetic this exercise creates, the bench press and all its variations (incline, decline, close grip, with dumbbells, and the floor press) is a movement that targets the chest, triceps, and shoulders. It is one of the best movements to build horizontal pressing strength.
Like most barbell exercises, it allows you to use a greater load than you could muster with kettlebells or dumbbells. Powerlifters should train the bench press routinely since it’s one of the three competition lifts alongside the squat and deadlift.
How to Do the Barbell Bench Press
- Lie flat on your back on a bench and get your eyes directly underneath the barbell.
- Grip the bar with your hands wider than shoulder-width apart. Bring your feet closer to your glutes, push your feet back, and unrack the bar so that it’s over your chest.
- Lower the bar slowly to your chest as you breathe in and push your feet back.
- Arch your back slightly to push the barbell up until lockout.
Coach’s Tip: Experiment with different grip widths until you find the one that works best for your limb length. Make sure to keep your lats engaged in stabilizing the lift.
Sets and Reps: Perform three to four sets of four to 10 reps.
Benefits of the Barbell Bench Press
- This move helps with increased chest, shoulder, and triceps mass.
- Since this exercise increases pressing strength, the more chance you have at lifting more when shoulder pressing.
- If you’re a powerlifter, this is a competition lift — so you’ll have no choice but to get good at it.
Bent-Over Barbell Row
The bent-over row is a popular exercise in weightlifting and bodybuilding since it strengthens and increases mass in the upper back and lats. It allows you to use the most weight relative to other rowing variations. Lifting heavier weights regularly with good form equals more muscle.
Because you’re in a hip hinge position, the bent-over row trains the lower back isometrically. A stronger lower back will help you brace and maintain a rigid torso when deadlifting and squatting.
How to Do the Bent-Over Barbell Row
- Place a loaded barbell on the floor and stand with your feet slightly more than hip-width apart.
- Hinge down to the barbell and grab the barbell with a shoulder-width grip. Then, bring the barbell up to knee level with the back straight and torso bent at 45 degrees.
- Pull the barbell between your navel and sternum.
- Pause, then slowly lower the barbell back down and repeat.
Coach’s Tip: If you feel like you need to compromise your back position to gain momentum to start your set, you’re lifting too heavy. Lower the weight.
Sets and Reps: Perform three to four sets of six to 10 reps.
Benefits of the Bent-Over Barbell Row
- This compound movement adds strength and mass to your upper back, lats, and erector spinae.
- It reinforces good hip hinge mechanics, which has direct carryover to your deadlift.
- You’ll improve postural strength and control.
Hang Clean
A move you’ll likely see in any CrossFit gym is the hang clean. It’s great for practicing the second half of the clean — a popular movement in functional fitness competitions — and building upper body strength.
The hang clean can be beneficial for experienced weightlifters and a good starting point for athletes of all levels. If you’re looking for gains in athletic performance or explosive movements like sprinting or jumping, check out the hang clean.
How to Do the Hang Clean
- Load a barbell with an appropriate amount of weight for your fitness level or use an empty bar. Your hands should be slightly wider than shoulder-width apart on the barbell, and it should be in the “hang” position — meaning your hips are pushed back, weight is in your heels, and the barbell is sitting at your mid-thigh.
- Keeping your spine neutral and your lats flexed, extend your hips while shrugging your shoulders to pull the bar and drop yourself underneath it.
- With the weight in your heels and hips pushed down, catch the bar in your palms on your shoulders and turn your elbows up, so they are pointing in front of you.
Coach’s Tip: Warm up your wrists before beginning a clean-focused workout. This will help you cycle the barbell much more effectively.
Sets and Reps: Do three to four sets of six to 15 reps, depending on your goals.
Benefits of the Hang Clean
- If you’re looking to improve your overall strength, the hang clean works the trapezius muscle, which is located in the neck and upper back and helps lift heavier weights in exercises like rows or deadlifts.
- The hang clean is great for building strength but is also great for cardiovascular health. So if running isn’t your thing, but you want to burn some fat, try a few of these, and you’re guaranteed to get that heart rate up.
- Once practiced and perfected, the hang clean can improve coordination.
Weighted Dip
Weighted dips allow you to simultaneously work your chest and triceps depending on the positioning of your body. Compared to most triceps exercises, the range of motion you achieve doing dips is longer, so it’s generally considered one of the best triceps exercises.
Suppose you can’t do weighted dips yet — no problem. Use your body weight until you build up your strength and endurance. Once you’re ready, add weight in small increments using a dipping belt.
How to Do the Weighted Dip
- Either use a weight belt, or weighted vest, or hold a dumbbell between the legs for resistance.
- Squeeze the bars with each hand and lower yourself down until your elbows break 90 degrees.
- Still squeezing the bars, drive yourself upwards while maintaining a slight forward lean.
- When approaching lockout, flex the back of your triceps, pause for a second, and slowly lower down and repeat.
Coach’s Tip: To target your chest more specifically, lean your torso forward.
Sets and Reps: Do three to four sets to near failure.
Benefits of the Weighted Dip
- You’ll gain improved lockout strength for exercises such as the bench press, overhead press, and Olympic lifts.
- It builds strength and muscle mass in the chest, triceps, shoulders, and back.
- You can adjust this exercise to work more of your chest muscles (by leaning forward) or stay more upright to focus on the triceps.
Mix-Grip Pull-Up
Pull-ups and chin-ups are great exercises to increase the size and strength of your biceps, upper back, and lats. Different variations possess their benefits. However, the mix-grip pull-up is a bit better for two reasons.
First, an uneven grip places your body in a state of rotation, and fighting that rotation recruits more core muscle. Simply put: it’s a better exercise for your core. Second, since you’re stronger with an underhand grip, it is less intense than a pull-up but more intense than a chin-up. That makes the mix-grip pull-up a great intermediate variation for folks trying to up their pull-up game.
How to Do the Mix-Grip Pull-Up
- Grab a pull-up bar with an alternating grip — one palm facing you and the other facing forward.
- Engage your core and grip tight to pull yourself up until your chest is even with the bar.
- Pause for a second and lower down slowly.
- Do all your repetitions in this position, then switch your grip for the next set.
Coach’s Tip: Use a resistance band to perform band-assisted pull-ups if need be.
Sets and Reps: Perform three to four sets to near failure.
Benefits of the Mix-Grip Pull-Up
- Alternating grip saves you from overuse injuries, like tennis and golfers elbow that comes from using one grip too much.
- This move can improve your ability to do more chin-ups and pull-ups. If you struggle with pull-ups, this is a great alternative.
- Improves anti-rotational strength, which is important for sports like golf, football, and baseball.
Chin-Up
The chin-up requires a lot of prerequisite strength, stability, and mobility — but perhaps less so than the pull-up. In this way, the chin-up may be more accessible to beginners. If you’re still new to the movement, use resistance bands to assist you.
And if you’ve already mastered the chin-up, keeping them actively in your repertoire will help ensure continued back and biceps strength. You can even add pauses at various spots in your range of motion to increase time under tension and kickstart even more muscle growth.
How to Do the Chin-Up
- Grab hold of a pull-up bar with your palms facing you, a little closer than shoulder-width apart.
- Hang from the bar until you’re stable. Initiating the pull with your back, drive your elbows down toward your back packets.
- Pull yourself up until your chin clears the bar. Lower with control and repeat for reps.
Coach’s Tip: Keep your core engaged and in a hollow hold. This will ensure that your whole body is working and that the move is as efficient as possible.
Sets and Reps: Perform two to four sets to failure.
Benefits of the Chin-Up
- This move builds tremendous back strength, but relies very heavily on your biceps, as well.
- Even though it’s a tough exercise to master, the chin-up is adaptable to all experience levels with assisted versions and weighted versions.
- The chin-up is a milestone bodyweight exercise that many athletes use as a prerequisite for building up to their first pull-up.
Push-Up
Ah, the push-up. It’s an exercise that’s so simple, yet so many people have difficulty with it. Although it seems like a simple task, it takes time, progression, and practice to do one properly. When done with good form and a full range of motion, this compound exercise activates multiple muscles in your upper body, such as your chest, shoulders, triceps, and abdominals.
Push-ups are a quick and effective way to build strength and require nothing but your body weight. (Though, you can add a weight vest or weight plate to make the movement more challenging.)
How to Do the Push-up
- Start in a plank position with your hands stacked underneath your shoulders, your back flat, and your core tight.
- Maintaining a straight line from your head to your heels, slowly lower your body to the floor by bending your elbows. Go as close to the ground as you can without losing tension.
- Press the floor away from your hands while maintaining a tight core to avoid dipping hips. Finish in the position you started in.
Coach’s Tip: If your chest or stomach prevents you from reaching a full range of motion, you can place your hands on low steps, dumbbells, or push-up handles to give your body the room you need.
Sets and Reps: Perform three to four sets to near failure.
Benefits of the Push-up
- The push-up is a functional movement, meaning it imitates and makes the movements we may perform daily easier, such as doing yard work or vacuuming.
- Weight-bearing movements like the push-up increase bone density, which makes our bones stronger and harder to break. This is especially important as we age.
- This exercise has plenty of variations, making it great for beginners or those looking to improve their bench press.
Dumbbell Pullover
If you’re looking to improve strength and mobility, all you need is a bench and a dumbbell for the dumbbell pullover. This exercise targets your chest, triceps, and — unlike the dumbbell chest press — the lats.
Although it may not be as popular as the chest press, there are plenty of benefits that might just have you rethinking your workout plan.
How to Do the Dumbbell Pullover
- Start by lying face-up on a bench with your arms extended above your chest and a dumbbell placed in a diamond grip (make a diamond with your hands and place the bottom of the weight plate in between).
- With a slight bend in your elbows, slowly lower your arms until you feel a stretch in your chest and lats.
- Reach as far back as your shoulder mobility allows. Engage your lats to pull the weight back to the starting position.
Coach’s Tip: Make sure you have a very stable grip on the dumbbell during this movement. You may not want to do it when your grip is extremely exhausted, for safety reasons.
Sets and Reps: Perform two to four sets of eight to 15 reps.
Benefits of the Dumbbell Pullover
- Moves like the pullover that load your muscles under stretch are particularly beneficial for muscle gain. This exercise induces what’s called stretch-mediated hypertrophy, and it is said to stimulate as much as three times the muscle growth, so if you’re looking to gain muscle fast, try this move. (1)
- The pullover improves shoulder mobility and flexibility, which may decrease your chance of injury.
- The pullover also improves core stability, because to resist extension of the spine you have to squeeze your abdominal muscles.
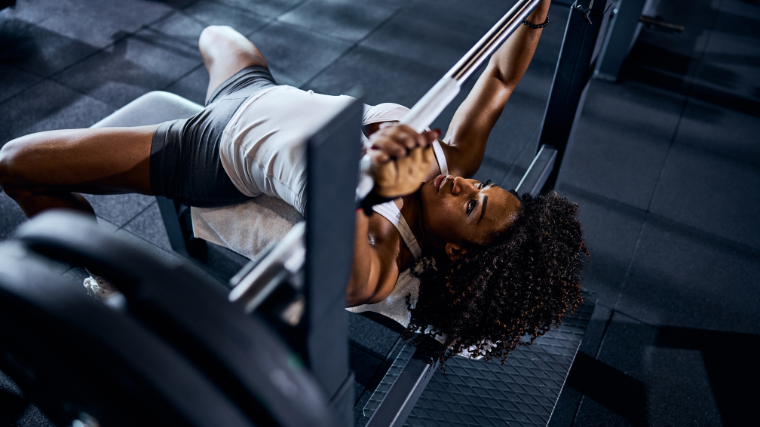
Lat Pulldown
If you’re looking to target the largest muscle in your back, the latissimus dorsi, try the lat pulldown. This exercise allows for heavier weights and more reps because your body will generally be stabilized by the machine.
Struggling with pull-ups? The lat pulldown is a valuable stepping stone since it imitates a similar movement as a pull-up and allows you to add resistance to increase the intensity.
How to Do the Lat Pulldown
- Sit straddling the bench facing the lat pulldown machine, or tuck your thighs underneath the pad if you have access to one.
- Pull your shoulders away from your ears and use your back to pull the bar down to your upper chest. A slight lean back is okay if needed.
- Slowly extend the arms to your starting position.
Coach’s Tip: Vary your grip using different handles or grip widths to alter the exercise angle.
Sets and Reps: Do three to four sets of eight to 15 reps.
Benefits of the Lat Pulldown
- Strengthening your lats with the lat pulldown can help improve your posture and spinal stability as the muscles surrounding your backbone grow stronger.
- Practicing the lat pulldown can help perform daily tasks outside the gym that involve a pulling motion as simple as opening a door.
- A cable pulley provides more tension on a muscle, resulting in more overall muscle- and strength-building tension.
Bear Crawl
We admit this is an unusual pick, but hear us out: The bear crawl — a move that has you crawl with your feet and hands positioned under your hips and shoulders — amasses a lot of tension on your shoulders, triceps, and chest.
Don’t expect to pack inches onto your muscles, but it’s a great way to teach your body stability. Also, its static brother, the bear plank, is a unique position you can row from for a back and core double whammy.
How to Do the Bear Crawl
- Start in a tabletop position with your hands directly underneath your shoulders and your knees under your hips. The weight of your body should balance on your hands and toes as you hover your knees off the ground.
- Just like in a plank, keep your back flat and core tight as you step your right hand and left foot forward, then your left hand and right foot forward.
- Keep this pattern moving for as long as you can maintain it.
Coach’s Tip: Try to keep your knees as close to the ground as possible. This will engage all your muscles even more.
Sets and Reps: Perform three to four sets of 30 to 45-second crawls.
Benefits of the Bear Crawl
- The bear crawl requires balance and coordination, two things that not only help you physically but mentally. One study suggests that practicing balance work may improve memory and spatial cognition. (2)
- It might not look like it at first, but the bear crawl is also great for getting your heart rate up, which improves cardiovascular health.
- Since your shoulders and core are your main support system, doing the bear crawl increases core and shoulder stability, which can help to reduce the risk of injury.
Inverted Row
The inverted row is not just a great movement to build up to pull-ups, but you can forge a muscle-laden back and loads of core strength. This exercise does not get as much recognition as it should — mainly because it’s seen as Pull-Up Lite — and can benefit anyone from beginners to experienced weightlifters.
Although underrated, there are plenty of benefits to the inverted row — it’s scaleable, can be done almost anywhere, and taxes the back muscles without loading the joints.
How to Do the Inverted Row
- Set a barbell at waist height in a power rack.
- Get under the bar and grip it slightly wider shoulder-width apart with your palms facing away from your head.
- Extend your arms and extend your legs, so your body is in a straight line from your head to your heels.
- Keeping that straight line, pull your body up to the bar until your chest reaches it, then slowly lower back to your starting position.
Coach’s Tip: The more horizontal you are, the harder this movement will be. For beginners, set the bar higher and perform slightly fewer horizontal rows until you can work your way to a fully-horizontal position.
Sets and Reps: Perform three to four sets to near failure.
Benefits of the Inverted Row
- Since you can crank out more reps with this exercise, it builds the major pulling muscles in your back like the lats, traps, and rear deltoids.
- With your heels on the ground, you have more support with this exercise, so it takes the strain off the lower back.
- While very challenging, the inverted row is scalable to beginners who want to build major back strength.
Overhead Triceps Extension
If you want bigger arms, the triceps make up roughly two-thirds of your upper arm compared to your biceps. These muscles are responsible for arm extension, so strong triceps also mean stronger arms and shoulders overall.
The triceps are made up of three muscles, also known as heads, and during this exercise, you target all three. That makes this one of the most effective triceps exercises to perform.
How to Do the Triceps Extension
- Place a dumbbell in a diamond grip (make a diamond with your hands and place the bottom of the weight plate in between) and hold it overhead with your arms fully extended.
- Tighten your core, relax your shoulders, and keep your elbows tight to your head as you begin to bend your arms. Stop bending when your arms have made a 90-degree angle.
- Press back up to your starting position.
Coach’s Tip: You can perform this exercise seated or standing. Either way, keep your core steady.https://www.youtube.com/embed/-Vyt2QdsR7E
Sets and Reps: Perform two to three sets of 15 to 20 reps.
Benefits of the Overhead Triceps Extension
- Since this is an isolation exercise, meaning you target the triceps and only the triceps, it’s a beneficial move for building muscle and aesthetics.
- The triceps extension helps improve shoulder and elbow stability, improving daily tasks such as lifting or pushing something heavy.
- Strong triceps help improves athletic performance in areas such as throwing a baseball or swimming.
Landmine Press
The landmine press is less intense than the standard shoulder press or overhead press since it does not require as much shoulder flexion (due to the angled pressing path).
However, that doesn’t make this exercise any easier, and it’s a great way to target your shoulders, chest, triceps, and biceps. If you’re looking for a more comfortable pressing option that also requires less of a load to be effective, then give this exercise a shot.
How to Do the Landmine Press
- Set up a barbell in a landmine base or, if you don’t have one, the corner of a wall. If performing the movement with one arm, grab the barbell at the top with one hand and hold it on the side you’re pressing from. If performing the move with both hands, grip the barbell and hold it in the middle of your chest.
- Press the barbell straight forward until your arm(s) are fully extended.
- Slowly lower the bar back to your starting position.
Coach’s Tip: Adjust your foot position as needed until you find the proper angle where you feel your entire shoulder girdle engaging.
Sets and Reps: Do three to four sets of eight to 15 reps.
Benefits of the Landmine Press
- When performed as a unilateral movement, the landmine press can help improve balance and find shoulder instabilities.
- If your shoulder mobility is lacking, try the landmine press instead of an overhead press to avoid unnecessary strain on the lower back.
- The landmine press is great for building upper body strength, and there are different variations to target different muscle groups.
Farmer’s Carry
Heavy carries are a great way to build a bigger and more durable upper body. As the name implies, a heavy carry is defined as literally carrying a heavy object for a set distance or time. Gripping a heavy object taxes the muscles in the upper back, traps, and forearms.
It’s also a pretty tough cardio challenge, so sets of loaded carries will do wonders for your conditioning, too. As for which carry to try, we like the farmer’s carry. It’s one of the most convenient loaded carries as it requires just a pair of dumbbells, kettlebells (or really anything heavy), and some space to walk.
How to Do the Basic Farmer Carry
- Grab a pair of heavy dumbbells from the rack, grip them tightly, and stand tall by keeping your shoulders down and chest up.
- Walk slowly and deliberately in a straight line, placing one foot in front of the other for the required distance, and then set the weight down carefully.
Coach’s Tip: Keep your shoulders back and down throughout the exercise to maintain back engagement.
Sets and Reps: Perform three to four sets to near failure.
Benefits of the Farmer’s Carry
- It improves shoulder stability as the rotator cuffs are working hard to keep your shoulders in your sockets.
- Strengthens core and hip stabilizers because every step of the farmer’s walk is a single-leg stance.
- The farmer’s carry massively improves grip strength.
Incline Y Raise
So many upper body exercises are about the bigger muscles. Compound movements are essential to developing the upper body, to be sure. But you can’t neglect those often overlooked movements, which require more subtle movements. And the incline Y raise is one of the best.
You’ll lie down prone and focus all your energy on making sure your rhomboids, rear delts, and traps are doing all the work. Avoid yanking your arms and keep your shoulders away from your ears. You’re bound to feel it, in the best of ways.
How to Do the Incline Y Raise
- Lie face down on a bench set at a 45 to 60-degree incline. Hold very light dumbbells — or nothing at all — in your hands.
- With your thumbs facing the ceiling and your shoulders tucked back and down, slowly raise your arms in a Y position.
- Squeeze your shoulder blades and hold the top position for two to three seconds. Lower with control.
Coach’s Tip: Concentrate on making sure that every part of the movement is coming from your shoulder blades. Focus on keeping your shoulders away from your ears.
Sets and Reps: Perform two to three sets of 15 to 20 reps.
Benefits of the Incline Y Raise
- This movement will train the often-neglected rhomboids, rear delts, and traps.
- Since you won’t be using any weight (at most, between two and five pounds), this move won’t eat into your recovery and may even help improve pain from shoulder impingements.
- The incline Y raise may not look like much, but it will require a great deal of discipline. Cultivating this focus can pay strong dividends with your bigger lifts.
Chest-Supported Dumbbell Row
This isn’t your normal dumbbell row. Once again, you’ll have your adjustable weight bench set up at an inline. You’ll use the support from the bench to make sure that the exercise is focusing on your back and nothing else.
Yes, your biceps will still kick in to help you, but the bench supporting your chest will help you make sure the primary movers are your lats. You’ll also safeguard your lower back from the potential strain of rowing heavy weight in a hinge position.
How to Do the Chest-Supported Dumbbell Row
- Grab a heavy dumbbell in each hand. Lie prone on an incline bench.
- Let the weights pull your shoulder blades down toward the ground. By squeezing your shoulder blades, row the weights.
- Pull your elbows toward your pockets. Squeeze briefly at the top, and lower down.
Coach’s Tip: There’s no need to yank the weights to the biggest possible range of motion. You can stop when your arms reach a 90-degree angle.
Sets and Reps: Perform two to four sets of eight to 12 reps.
Benefits of the Chest-Supported Dumbbell Row
- This move is an excellent back builder. If you’re looking to drive back hypertrophy, this will help you out in a big way.
- By using the bench to support your chest, you’ll be able to row a lot more weight safely.
- The support from the bench will eliminate any unwanted assistance from muscle groups you’re not trying to target.
Dumbbell Bench Press
While it may not feel as glamorous as stacking on the weight plates, the dumbbell bench press is a must when you’re trying to build a strong, symmetrical chest. The unilateral nature of the lift means that you’ll be working both sides of your body evenly — a must for athletes looking to maintain a balanced physique.
The dumbbell bench press can be performed on a flat bench, at an incline, or at a decline. For the most well-rounded chest hypertrophy, rotate all three variations into your program. This will allow you to hit your chest muscle fibers — and stimulate growth — from multiple angles.
How to Do the Dumbbell Bench Press
- Grab the dumbbells and bring them to your thighs.
- Use your legs to help you kick the dumbbells to chest level. In a fluid motion, lie on your back on a weight bench adjusted to the angle of your choice.
- Perform a press, making sure you stabilize the weights at the top.
- Slowly lower the weights until they reach your chest, then press back up.
Coach’s Tip: If your shoulders tend to bother you during the barbell bench press, move with extra attention to your form. There’s no need to sink your elbows as far down as you can. If need be, you can simply lower until your arms just hit or barely pass 90 degrees.
Sets and Reps: Perform two to four sets of six to 15 reps, depending on your goals.
Benefits of the Dumbbell Bench Press
- This move is a powerful chest strength and muscle-builder.
- You can perform the dumbbell bench press from multiple angles — flat, incline, and decline — for well-rounded chest growth.
- Because this lift is unilateral, you’ll be able to iron out strength and muscular asymmetries to promote even chest development.
Incline Dumbbell Curl
By sitting down and resting your back against a bench to perform incline dumbbell curls, you’re ensuring minimal unwanted recruitment from your shoulders. You’ll also be avoiding momentum from your lower body. That means that it’ll be all biceps, all the time. And that’s exactly what you want.
These might be especially helpful if you’re having trouble fully extending your arm without elbow pain. By limiting the end range of motion while allowing full extension, this move can help you develop your biceps without adding too much strain to your elbows.
How to Do the Incline Dumbbell Curl
- Sit on an incline bench at about a 45-degree angle. Hold a dumbbell in each hand with your arms fully extended.
- Keep your shoulders back and down. Curl the dumbbells to full contraction. Squeeze your biceps at the top.
- Slowly lower with control.
Coach’s Tip: Concentrate on keeping your shoulders still to ensure that all the work is coming from your biceps. Press your lower back into the bench.
Sets and Reps: Perform two to three sets of 12 to 15 reps.
Benefits of the Incline Dumbbell Curl
- This move eliminates any momentum from your biceps curl, increasing the accessibility of proper form to beginners.
- Since you’ll be pinning your shoulders back and down the whole time, this move is also good for training your shoulders and upper back to build strength and stability.
- The incline dumbbell curl is an excellent strength and muscle-builder for your biceps.
Reverse Curl 21
The reverse curl is an excellent dual builder of powerful forearms and biceps. If you want to build your arms holistically — not to mention fashioning stronger wrists — reverse curls are for you.
Adding the 21s method to the mix is only going to make this move more powerful. You’ll be using three different ranges of motion seven times within each “rep.” You’ll do seven reps of each range, adding up to 14 partial reps and seven full range of motion reps. You’ll spend a whole lot of time under tension, ensuring a great pump and muscle growth.
How to Do the Reverse Curl 21
- Start in a fully extended position. Curl the dumbbell or barbell to halfway of your range of motion, stopping when your arm reaches a 90-degree angle.
- Perform the next seven reps from the 90-degree angle up to the fully contracted position.
- Do the next seven reps all the way up and down with a full range of motion. That’s one “rep.”
Coach’s Tip: It’ll be tempting to load up heavily on these, but avoid that until you’re sure you can do it. You don’t want to be bouncing your reps or breaking form, so build up slowly for maximum growth potential.
Sets and Reps: Do two sets of one “rep” (which is comprised of 21 reps).
Benefits of the Reverse Curl 21
- You’ll build your forearms and your biceps effectively with this move.
- The 21s method requires you to spend a great deal of time under tension, increasing your muscle-building potential.
- These are great intensity boosters when you’re short on time but want to push yourself toward failure.
Upper Body Warm-Up
It’s tempting to walk up to the weight bench, swing your arms around a couple of times, load up the weight plates, and get pumping. But that’s not exactly going to set you up for success. Instead, opt to prepare your body for maximal (and safer) performance by completely getting those joints and smaller muscles ready for action.
- Cat Cow: 10 breaths
- Face Pull: 20 reps
- Band Pull-Apart: 20-25 reps
- Wall Slide: 10-15 reps
- Scapular Push-Up: 10-15 reps
- Inch Worm with Push-Up: 10 reps
- Lunge With Thoracic Opener: 10 reps per side
In addition to your warm-up, make sure you’re doing ramp-up sets to get your body ready for heavier weights. When relevant, start with an empty barbell and increase the load gradually until you reach your working weight.
How to Train Your Upper Body
The upper body muscles improve core, spine, and shoulder stability. It’s important to train these muscles regularly to maintain mass, strength, and performance. Below are different ways to implement them into your training program.
Exercise Selection
When selecting which exercises to perform, keep your goals, current program, and restrictions in mind. For example, if you’re looking to attempt a one-rep max deadlift, the bent-over barbell row is a good warm-up exercise to prepare your back for the load. However, you might not be choosing a biceps curl to prevent tiring out the muscles that help with the pull.
- Choose exercises that will help prepare for your programmed workout.
- Program the workout around any injuries, limitations, or progressions that might be needed.
- It can be performed in the area you’re in. If you don’t have access to a pull-up bar or a supportive apparatus, you most likely won’t be attempting pull-ups that day.
Sets and Reps
Your volume and load are going to depend on your goals for each exercise. Rep schemes will also vary throughout each workout. You might be aiming to build max strength with your main lift — say, the overhead press — but supplementing with accessory exercises to stimulate hypertrophy.
Here’s a general guide for upper body sets and reps:
- For Muscle Growth: Do two to four sets of eight to 15 reps, using a load and rep scheme that helps you approach failure within that frame.
- For Strength: Perform three to five sets of three to six reps.
- For Endurance: Do two to three sets of 15 to 25 reps.
Upper Body Training Tips
The upper body muscles help support us in and outside the gym. As you are programming and performing your workouts, there are rules to keep in mind when trying something new or adding more weight.
Prioritize Compound Lifts
At times, beginners and misguided lifters spend too much time on variations of cable curls, fancy dumbbell raises, and other isolation movements at the expense of compound exercises.
By prioritizing compound lifts — meaning a lift that involves the movement of one or more joints — you’ll engage more muscle overall.
Common upper-body compound movements include rows, overhead presses, and the bench press. That’s not to say that overhead triceps extensions don’t have a place in your training — they’ll just be programmed after your biggest lifts of the day.
Brace Your Core
If you’re not used to bracing your core, it may be difficult to understand the concept. Without a tight core, you risk the chance of putting extra strain on your neck and your back, and you’ll have a better chance of getting injured. Besides injury prevention, bracing your core effectively shifts force through your body to help lift the weight.
One Size Does Not Fit All
When creating or following a program, it’s important to understand that it should be catered to you and your goals. Don’t be afraid to modify exercises to progress.
For example, if you can’t perform push-ups at a full range of motion on your toes, take it to your knees to activate as many muscle fibers as possible. It’s also important not to compare yourself to others. Everyone works at their own level, and everyone has to start somewhere.
Benefits of Training Your Upper Body
Aside from getting the V-taper, there are plenty of benefits to training your upper body. When you are pushing, pulling, or hinging with weights or just your body weight, exercises help you perform tasks in your daily life. They improve flexibility and mobility, which can help to reduce your risk of injury.
Reduced Risk of Injury
With a stronger upper body comes more stability. Every day you are most likely pushing and pulling moderate to heavy objects, whether opening a door or moving furniture. Maintaining muscle mass is especially important as you age because you lose muscle as you get older.
Research suggests that muscle mass decreases about three to eight percent per decade after you pass 30 years old, so it’s important to continue to load your muscles. (3)
Improve Other Areas of Training
A strong upper body is not only important for better shoulder presses but is also beneficial in other areas such as squats or deadlifts. Pulling a heavy barbell when deadlifting activates your biceps and back muscles.
The stronger these muscles, the more weight you can lift. When squatting, the core muscles are engaged, and the stronger these are, the more you can lift properly, and the less chance there is for injury.
Build a Strong Upper Body
It’s not just about developing other areas of your training life. By developing a strong, powerful upper body, you’ll be able to become more competitive at any strength sport. Whether you’re trying to develop an X-frame for your next bodybuilding show or boost your Total in weightlifting, you’ll need to train your upper body extensively to make it happen.
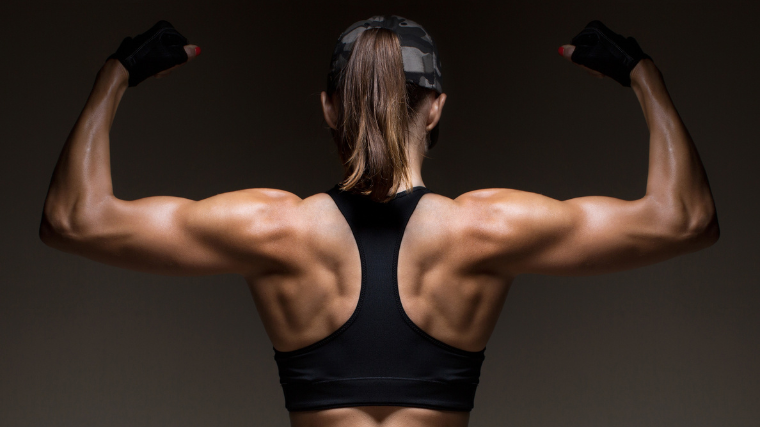
Anatomy of the Upper Body
Below are some of the larger muscle groups of the upper body targeted and trained by these upper body mass-building exercises.
Latissimus Dorsi (Back)
The latissimus dorsi, also known as the lats, is a large muscle group that runs across the entire posterior of the torso. The back is the key to lifting heavier, gaining size, and improving performance.
Along with the chest muscles, these muscles help posture and spine stability.
Pectorals (Chest)
The pectoral muscles (pectoralis major and minor) are developed by most horizontal pressing movements like the bench press (and the wide array of variations), push-ups, and dips. It’s important to keep these muscles strong because it helps with overall upper body strength and, along with the back muscles, helps prevent bad posture.
Deltoids (Shoulders)
The shoulder area comprises the deltoids and posterior shoulder complex/stabilizers (trapezius, scapular shoulder blades, and rhomboids). Vertical pressing movements like push presses and shoulder press variations are great movements for shoulder hypertrophy.
Triceps
The triceps are a smaller muscle group than the back and chest and serve an important role in aiding in pressing movements. They are also more responsible for arm mass.
Biceps
The biceps run along the anterior part of the arm and are responsible for elbow flexion and aiding in pulling movements like rows, pull-ups, carries, and deadlifts.
More Upper Body Training Tips
Now that you have a handle on the best upper body exercises to strengthen your chest, triceps, shoulders, back, and biceps, you can also check out these other helpful training articles for strength, power, and fitness athletes.
- The Best Upper Body Landmine Exercises for Building Strength and Mass
- The Best Neck Stretches to Improve Your Pulls and Overhead Lifts
- 5 Bench Press Programs to Build a Bigger, Stronger Chest
References
- Oranchuk DJ, Storey AG, Nelson AR, Cronin JB. Isometric training and long-term adaptations: Effects of muscle length, intensity, and intent: A systematic review. Scand J Med Sci Sports. 2019 Apr;29(4):484-503.
- Braumann, Klaus-Michael, Hollander, Karsten, & Hotting, Kirsten. (2017). Balance training improves memory and spatial cognition in healthy adults. Sci Rep. 22 (8)
- Fujita, Satoshi, Nazemi, Reza, & Volpi, Elena. Muscle Tissue Changes with Aging (2004). PubMed. 7(4)
Featured image: Makism Toome / Shutterstock