
Stability and strength. Two key components that will take your performance to the next level.
When moving heavy loads from point A to B (yes, this can also mean your bodyweight), there’s really no getting around the fact that you must possess a strong core. No, I don’t mean sporting a shredded six-pack. I’m talking about the kind of strength that will get you to (finally) hit that clean & jerk PR you’ve been chasing for a year. Or, maybe you’ve always struggled with overhead stability and you belt up as soon as you get moving an empty bar. Well, you know what I mean.
Ensuring you can maintain proper core stability from the moment you set yourself up to pick the bar off from the ground will either make or break your lift. Also, feeling strong and stable helps bring an element of confidence to your lifts as well. Have you ever picked up a barbell thinking the weight was loaded incorrectly because it moved so smoothly? Yep, I’ve been there. While I mostly attest it to my general weekly weight training, being diligent in doing any accessory work before or after a session can bridge the gap between hitting PRs with so-so technique to smashing big numbers with great power and crisp quality of movement.
Here are three anti-rotation core exercises you can easily add to your warm-up routine or at the end of your training sessions to help strengthen your core on every level.
Editor’s note: This article is an op-ed. The views expressed herein and in the video are the author’s and don’t necessarily reflect the views of BarBend. Claims, assertions, opinions, and quotes have been sourced exclusively by the author.
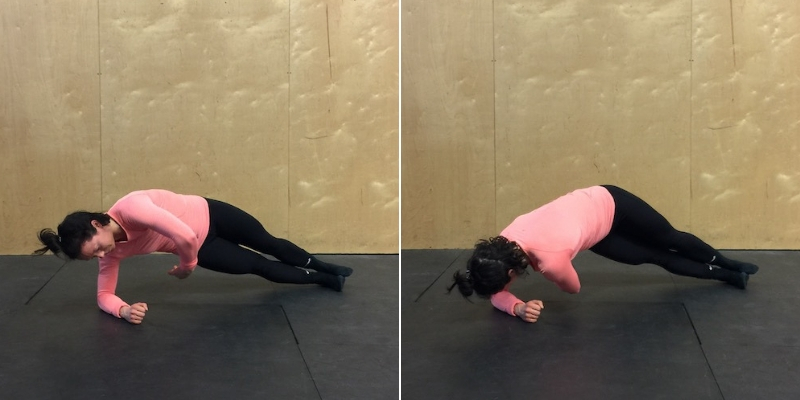
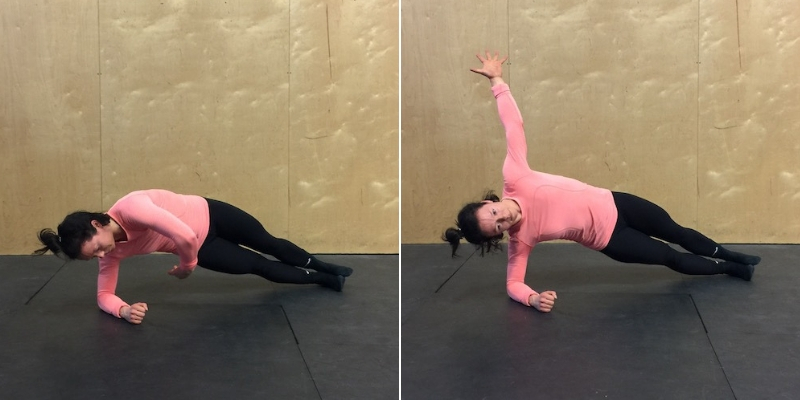
1: Side Plank Twists
First, get yourself set up on the ground laying on one of your sides. Then, bring your elbow into a 90 degree angle stacked right underneath your shoulder. Your legs should be extended out to the side one on top of the other. Push your hips upwards to elevate your body while maintaining pressure and tension throughout your support side. You should now be in a solid side plank position.
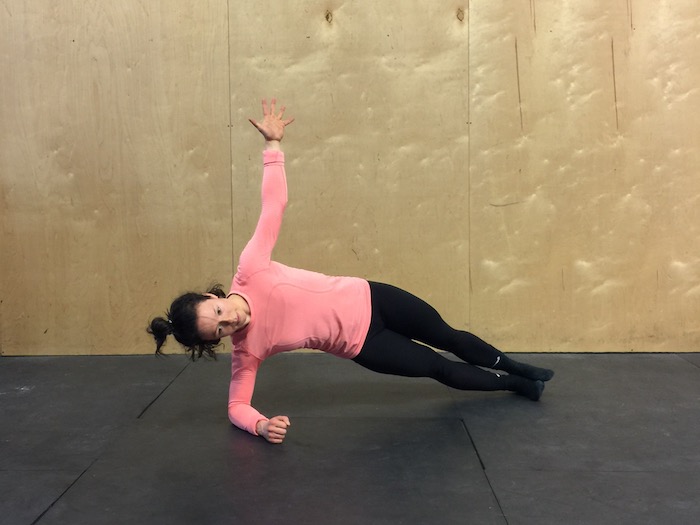
From there, with your free arm extended up, slowly rotate your upper torso towards the ground while threading your arm through the space below. Your feet should stay anchored together to the ground without any additional movement.
Then rotate back opening up your chest to bring yourself to the same starting position with your arm extended straight up.
As you perform this exercise, check in with yourself to make sure your hips don’t dip down while you’re rotating inwards.
The strength and stability you’ll develop in your serratus muscle will transfer over into your front rack position when performing any clean related movements. If you’ve ever struggled with keeping your elbows up in your jerk dip or throughout a heavy front squat, start adding side plank twists into your daily accessory work to gain muscular endurance in your serratus.
If you’re adding these to your warm ups, start by performing 2 sets of 8 reps each side. Then, once you build up the stability and can conserve the quality of the movement without shifting your hips throughout each rep, work up to 3 sets of 15 reps per side.
[Learn more: 6 lateral stability exercises for functional athletes.]
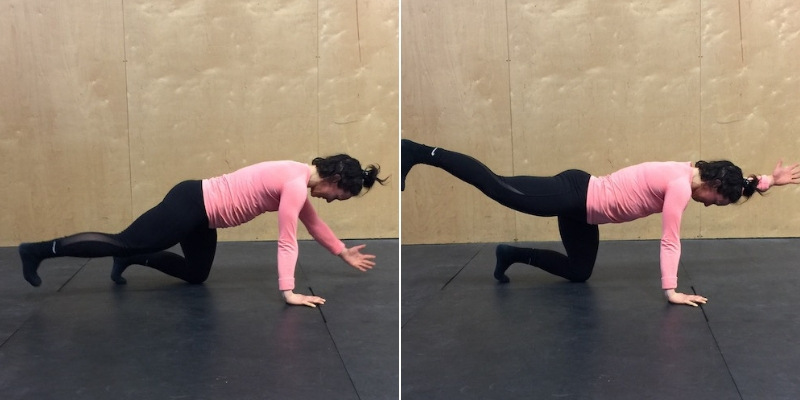
2: Bird Dogs
Set yourself up on all fours down on the ground. Make sure your shoulders are stacked over top of your wrists and you’re actively pressing into the ground to engage your lats. Flip your toes to firmly dig them into the floor to get your entire body involved in the movement.
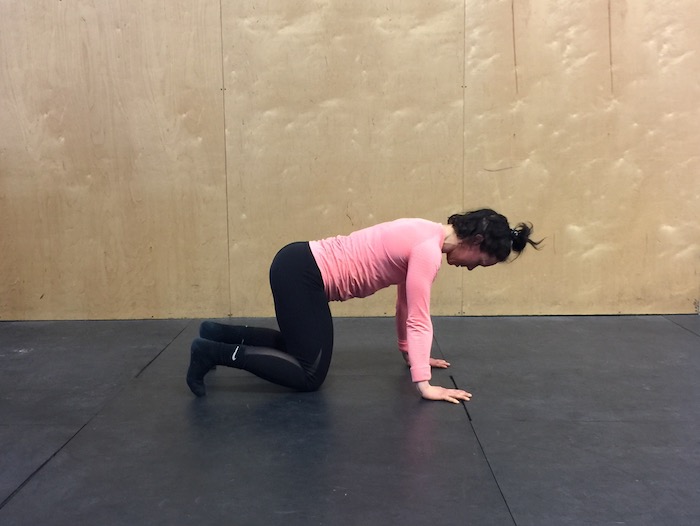
From there, you will simultaneously move your opposite arm to leg creating a diagonal line from your fingers to your toes. Broken down, your arm will slowly float up to align itself beside your ear with your thumb pointing upwards. As for your leg, from its bent position, you’ll keep your foot flexed driving your heel towards the back, engaging your glute at your end range.
As a lower impact accessory movement, Bird Dogs are great as a warm-up to prime your entire body. Looking to kick these up a notch? Grab a light resistance band to add some tension by looping it around your toes and grabbing the end of it with your opposite hand. Extending your arm and leg with additional tension will increase the demand from your lower back, both shoulders, glutes and (of course) your core.
Start working up to 8 reps per side and eventually build up to 3 sets of 10 reps per side. You should only start adding more reps/sets once you can maintain perfect form throughout the entire 10 reps on each side.
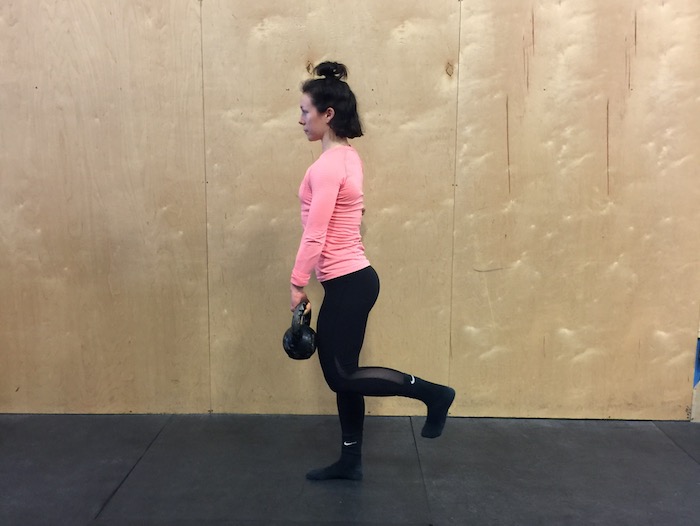
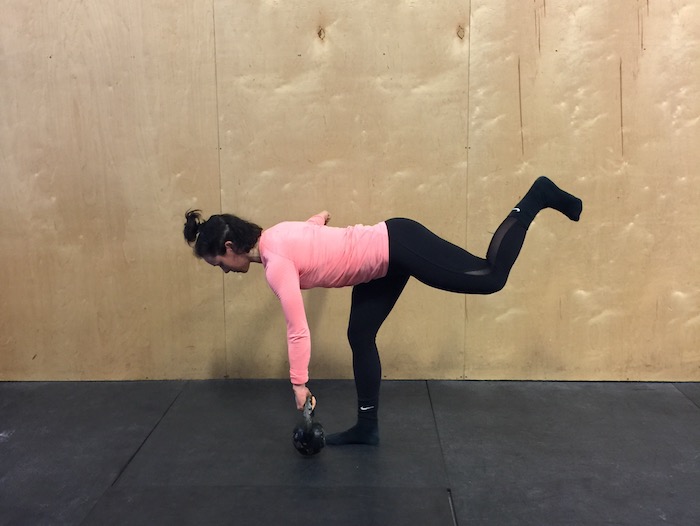
3. Single Leg RDLs
First, start by standing upright and shift your body weight to the opposite side of which you’re holding the kettlebell.
Slowly start hinging at the hip to gradually lower the weight to the ground, maintaining square shoulders and a tight lower back. While your upper body starts descending towards the floor, your free leg (the same side as the arm holding the weight) will simultaneously start to actively lift towards the back.
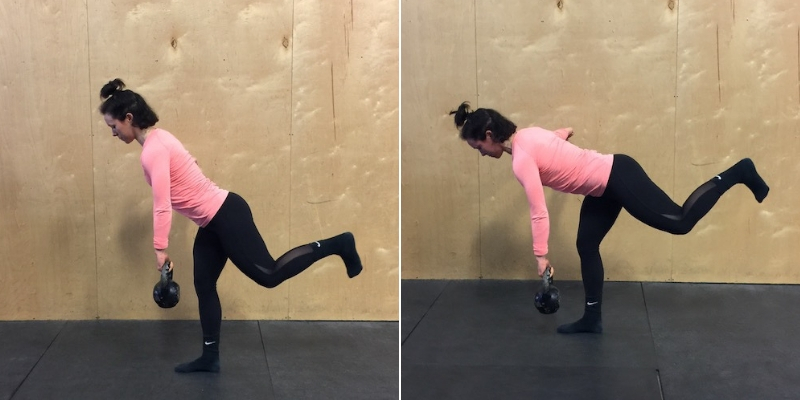
Once the weight touches the ground, reverse the same motion you just went through without losing balance to start again from standing. The key to a successful single leg RDL is to root your supporting leg into the ground with a slight knee bend to help stabilize your entire body and avoid any wobbling.
This exercise will target not only your glutes and hamstrings but by isolating these areas, it will help you perform a more stable split jerk position given the majority of lifters don’t practice the split with their non-dominant leg. As you progress and become more confident with single leg RDLs, increasing the weight will demand more stability from your rear delts and lats which can transfer over to a stronger pull for the snatch or the clean.
Pick a weight that’s heavy enough to keep your shoulders and upper back engaged throughout the entire movement but won’t compromise your form (the goal is not to find a 1RM). If you’re choosing a lighter weight, work up to 3 sets of 10 reps per side. Then, once you’re feeling comfortable balancing on one leg and hinging with a weight, pick a heavier kettlebell and work up to 5 sets of 6 reps per leg.
[This movement is deceptively difficult — refine your form in our complete guide to single leg RDLs!]
Wrapping Up
Strong body, confident mind, great performance.
Unilateral movements that don’t necessarily need a massive weight increase in order to amp up the difficulty level are likely the best option for Olympic lifters looking to add variety to their accessory work. Given most of you are working with loads raging from 75% to 88%, adding in too much intensity at the beginning or the end of your training could negatively impact your recovery and next lifting session. By focusing on moving well with intention and precision, you’ll gain stability and strength which will in turn make you more confident when performing your Olympic lifts.
As we all know, half the battle in weightlifting is in your head. The better your body feels under the weight, the more trust you’ll have in yourself to fulfill the numbers you’re truly capable of.
Featured image via fizkes / Shutterstock