
Much like Rome, a beautiful deadlift is not built overnight. A great deadlift is composed and built with multiple training elements that all work hand-in-hand with one another to manifest an efficient and strong pull. The very first factor in the long list of deadlift training elements includes: Deadlift setup.
Consider deadlift setup the foundation that a strong deadlift is built upon. If your setup is weak or unaccounted for, especially as a beginner, then you can run into a few problems down the road. Some of the problems that can come along with a weak deadlift setup include:
- Lack of power off the floor
- Loss of total body tightness when pulling the slack out of the bar
- Form breakdown or poor deadlift mechanic patterning
- Potentially higher risk of injury
These are only a few of the issues that you can run into with poor deadlift setup when pulling big weight. As you continue to get stronger, a strong deadlift setup will only become more important. Below, we’ve outlined five steps to dialing and perfecting your deadlift setup! Note, these steps are catered to the conventional deadlift and not sumo.
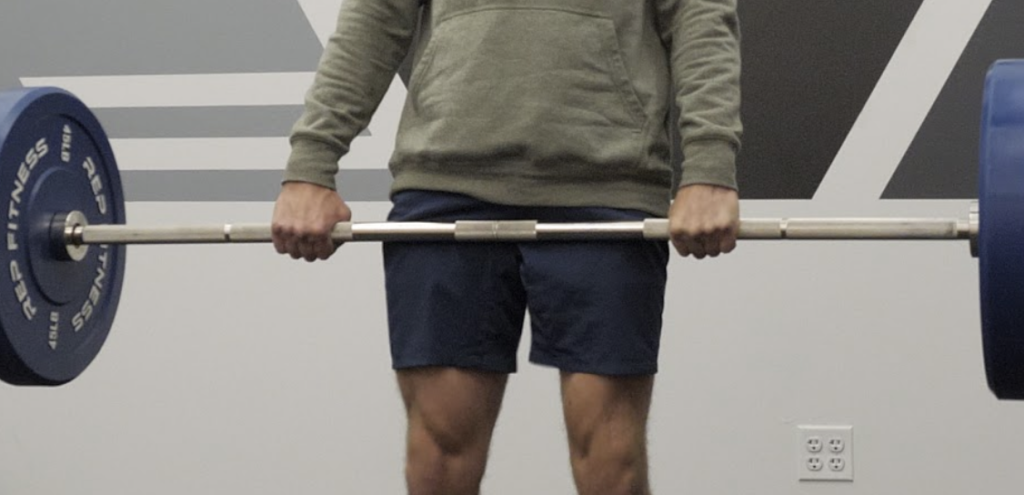
Step 1: Find Your Stance
Foot Width and Bar Placement
The first step includes finding where the bar should lie over the feet and how wide your feet should be. An excellent starting point for finding bar placement is to place the barbell directly over the mid-foot. What does this mean? As you’re standing and looking down at the barbell, then you’ll see that the barbell is covering the mid-foot. This may vary from user to user based on things like anthropometrics (limb lengths, height, etc), but the mid-foot tends to be the best bet for a large portion of the lifting population.
Stance width will come down to what is most comfortable for your body and your hip angle, and what prevents things like knee valgus (knees caving in). Generally, stances will range between hip and shoulder width. It’s also a good idea to slightly angle the toes to really grip the floor and create slight hip extension.
Step 2: Deadlift Grip
Finding Your Grip
The next step is gripping the barbell. An ideal grip will allow a clean bar path and limit friction between the arms and knees during the ascending (concentric) and descending (eccentric) portions of the lift. Ideally, the arms will lightly touch the outside of the knees when completely setup. Going too wide can disengage the lats, and going too narrow can cause problems with knocking into the knees.
Step 3: Setting the Back
Hip Hinge and Setting the Back
The third step is the most important and requires the athlete to set the back and hinge at the hips. This step will promote tightness in the posterior chain and support an athlete’s back’s (lumbar) safety. When setting for the conventional deadlift, it’s important to find a hip angle that is neither too high, or too low, as these two setups can cause a loss in power due to not utilizing the hip lever to the fullest extent.
This step is also essential for most hip hinging movements and deadlift variations like the Romanian deadlift and straight leg deadlift. A happy and healthy hip hinge equals strong and safe lifts.
Step 4: Pulling the Slack Out of the Bar
Creating Full Body Tightness
The fourth step includes pulling the slack out of the bar. This is essentially the relationship that we create between us (our muscles & nervous system) and the barbell at our feet. If you perform this step correctly, then there will be tension created by your posterior chain/body on the barbell, but the barbell will not be moving. It’s similar to holding the door open for someone, you’re maintain a constant tension on the door, but not creating a force that’s moving the object.
Step 5: Put It All Together
Pull That Weight!
The final step is connecting all of the first four steps with personal coaching cues you like to use for the deadlift. Out of all the steps, this step is the most lucrative and can be the most customizable, as everyone will likely have their own mental checklist when performing strong deadlifts.