
You want to improve your strength, conditioning, power, and grip strength, and you know that kettlebells can do it all.
But you have visceral memories of forearm pain from the dread kettlebell flop: that awkward moment where a lift is feeling really great until… ow. The entire bell slams down onto your forearm, and it’s tender for days (especially if you push through it without making the proper corrections, and rep after rep slaps your forearm). You’ve tried and tried, but you can’t seem to make the forearm flop not happen when you’re kettlebell cleaning or snatching.
If you want to keep reaping all the awesome benefits of these powerful movements but don’t want to cause your forearms or wrists anymore agony, these tips are going to help you out.

What Kettlebell Moves Can Cause Forearm Or Wrist Pain?
Any time you’re transitioning the kettlebell from hanging down from your fingers (the beginning of a clean) or facing straight out in front of you (the swing into a high pull that starts a kettlebell snatch), you’re going to have to worry about the bell slamming down onto the back of your forearm.
But it’s not just in those dynamic movements that forearm and wrist pain happen with kettlebells — especially once you start moving heavier weights, resting the bell improperly on your forearm during more static movements can be painful just from the pressure. Moves like Turkish get-ups, kettlebell overhead presses, and front-racked squats and front-racked carries can all put a lot of sheer pressure on your forearms as the weight rests there.
These movements require you to keep the bell in relatively the same position throughout the lift, which means — again, especially as you move up in weight — that your wrists also might get tired. Your body (and mind!) will naturally want to take all that pressure off of your forearm. To do that, it’s tempting to let the bell pull your wrist out of neutral position. It might give temporary relief to your forearm, sure, but at the cost of your wrist being essentially yanked back by the weight instead of maintaining a neutral (and safe) position.
It’s tempting to let the bell pull your wrist out of neutral position. It might give temporary relief to your forearm, sure, but at the cost of your wrist being essentially yanked back by the weight instead of maintaining a neutral (and safe) position.
[Related: 4 kettlebell circuits for folks focusing on strength]
So How Do You Protect Your Forearms (And Wrists) While Using Kettlebells?
Offset Your Grip
The first kettlebell move that a lot of people learn is the swing. It’s a beautiful movement, powerful and crisp and something I could fanboy about for days (and do). But aside from basic swings and carries, most kettlebell movements require a very different grip than the swing. With a swing, you learn to grip the bell by the middle of the handle, with the center of your palm roughly surrounding the center of the handle. That works beautifully for swings — but with swings, the bell is never going to come into contact with your forearm.
For moves that involve contact with your forearm — from Turkish get-up and overhead presses to kettlebell cleans and snatches — the centered swing grip is just going to… hurt.
Instead, offset your grip: snuggle the web between your thumb and index finger into the curve of the handle. So, your right hand will be meeting the left curve of the bell’s handle; your left hand will be meeting the right curve of the handle. Offsetting your grip like this — so your hand is on the side of the bell, not the center — will allow you to push your hand through the bell so it lands comfortably on your forearm, instead of flopping it over the center of your hand to slam down onto your forearm.
View this post on Instagram
Settle The Bell Diagonally
To make sure your offset grip is working at peak effectiveness, hold up your palm and check it out in the mirror. The bell should not be gripped so tightly that the handle is straight across the base of your fingers.
Instead, the handle should be almost positioned diagonally down the palm of your hand. That means that one side of the handle is tucked between your thumb and index finger, and the other side of the handle is roughly positioned at the bottom of your palm on the pinky side of your hand.
Make sure your hand is flat and open when you’re settling into this position, almost like pulling the slack out of the bar when you’re using a hook grip in your deadlift, opening your hand while you’re learning the proper form will let the handle settle into the natural curves of your hand. That will give you a taste of what the position should feel like (awkward at first, perhaps — but pain-free).
Loosen Your Grip
Especially because the first kettlebell move you probably learned is the swing, you’ve probably imagined the nightmare of the bell flying out of your hand and smashing your unsuspecting training partner’s toes. So you might have developed a bit of a death grip every time you pick up a bell.
This actually isn’t advantageous for the swing either, but it’s definitely not a good thing for forearm-involved movements.
Squeezing the hell out of the bell’s handle might feel more secure psychologically, but it’s unfortunately an inefficient use of your body’s energy — and it’ll ensure that you all but have to flip the bell over your hand and slam it down on your forearm to get into a racked position.
By loosening your grip, you give yourself more dynamic freedom to slip your hand underneath the bell as opposed to forcing the bell to arc over your hand and onto your already-bruised forearms. It’s also a wonderful feeling, to be honest, when you develop enough confidence in yourself to loosen that grip and even be able to “butterfly” your fingers a little bit during the lift — flutter your fingers out, just for fun, to remind yourself that your grip is athletic, strong, confident, and forearm-friendly.
[Related: 15 kettlebell moves to strengthen your grip]
View this post on Instagram
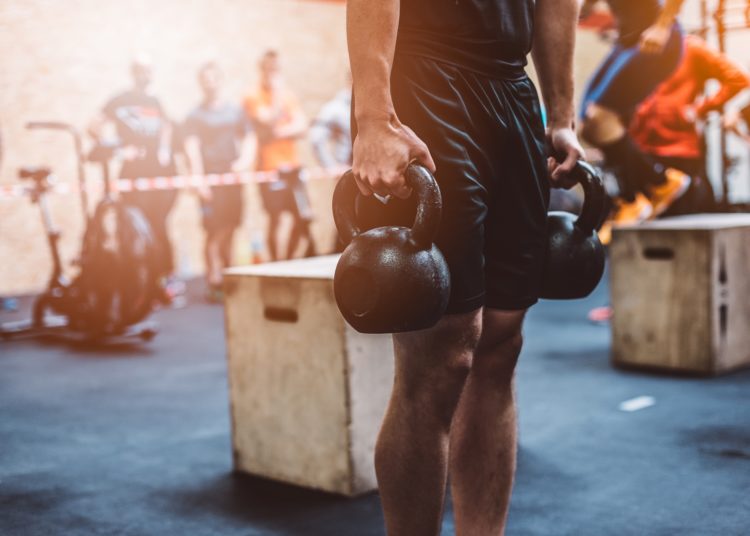
Keep The Bell Tight To Your Body
This one especially applies to kettlebell cleans. To generate more momentum-based force, it’s tempting to shoot the bell out with your hips in a wide arc, similar to that which you create in a kettlebell swing. But while you do want momentum driving your clean, you don’t want to create a big, swooping arch.
Instead, try cueing yourself to use your lower body momentum to drag the bell up close to your body (instead of swinging it away from your body). That way, when you’re transitioning the bell around your hand (to get it into rack position), you’re slipping your hand underneath the bell tightly and, dare I say… cleanly.
Whereas if it’s coming from a big swooping arc away from your body, it’ll be harder to control the transition into rack position. (Incidentally, that’s precisely why you transition from a swing into a high pull before snatching the bell above your head in a kettlebell snatch — to get the bell as close to your body as you can to give yourself better leverages.)
Focus On Your Elbow, Not The Bell
It’s tempting to cue yourself to flip the bell over your hand until it lands (oomph!) onto your forearm. Yeah… don’t do that. Instead, focus on locking your elbow toward your rib cage while simultaneously pushing your hand through the handle. That way, you’re relying on your body to complete the position change, rather than flipping (and therefore, forearm flopping) the bell. It’s a subtle cue difference, but a huge one.
[Related: The definitive guide to a forearm-friendly kettlebell snatch]
Motorcycle Your Wrist Foward, Not Back
Especially for less explosive movements (think: Turkish get-up, kettlebell overhead press, and front-racked squats) that require the bell to rest on your forearm, and especially as you start using heavier and heavier weights, the bell will start pulling on your wrist. The bell will team up with gravity to try and pull your wrist out of neutral position and back toward the weight (forcing your palm to tilt toward the ceiling).
This might feel okay at first, because it can take some pressure off your forearm in the short term. But it won’t end well for your wrist, which is essentially being tugged out of neutral alignment. And don’t try to compensate by raising your elbow laterally away from your body — this can help keep your wrist neutral and alleviate forearm pressure, but it’ll put your shoulders into a compromised position that you really don’t want to be in.
What else can you do? Temporarily kiss your ego goodbye and drop the weight slightly, teaching yourself to “motorcycle” your hands forward. Respond to the pull of the bell that’s yanking your wrist backward by pushing your wrist forward — the combination of the two competing pressures will keep your wrist in a healthy, neutral position. And, if you’re offsetting your grip properly, it won’t be too bad on your forearms, either.
Experiment With Your Timing
Everyone has different limb lengths, leverages, and speed of movement. Everyone has differently shaped and sized hands, and everyone moves just a little bit differently (even when form is picture perfect). So, a lot of this is about technique, yes — but just as much of it is about patience, and concentrating on finding the timing that works best for you and your body.
Is it easier for you to bring your elbow in as the bell is whizzing up past your hips, or when it’s closer to your rib cage? That depends on your torso length, arm length, the particular speed at which you tend to lift… all of that. Be patient with yourself as you figure out what timing works for you — just because a particular trick works for your long-torsoed training buddy doesn’t mean it’ll work for you. And that’s okay; think of the kettlebell as an extension of your own body. As such, the timing of all your movements and transitions will be unique, and might take a bit of experimentation to find.
Get (Not) Flopping
It’ll take a lot of trial and error, sure, but once you feel the miraculous feeling of holy crap that didn’t hurt at all, you’ll never want to stop kettlebell cleaning. It’s a magical feeling when you get it right, but try not to get frustrated with yourself if it still takes a long time to figure out how to re-create that beautiful lift consistently. It’ll take time, and sometimes, your forearm will just… get flopped on. Such is kettlebell life. But if you’re using the right grip and cues, your kettlebell lifting overall will get a lot more fun — and the gains will follow.
Featured image via @francheskafit on Instagram.